Legacy Connect guide
This guide applies to sites still using the older Connect app. The published Cloud 3.0.0 release uses Forge. New users should start with Create your first Excalidraw drawing, then use the current Cloud overview. Keep this legacy guide for editors with a separate Open Editor step; do not apply its save sequence to Forge.
Save and publish a legacy diagram
Section titled “Save and publish a legacy diagram”Canvas editors such as Excalidraw, Draw.io, BPMN, and Mind Map use three save boundaries:
- Choose Save and Close, or Save & Exit in Draw.io, to return the diagram to the macro dialog.
- Choose Insert for a new macro or Save for an existing macro.
- Choose Publish or Update in Confluence.
Text-defined macros use their macro editor instead of Open Editor. Enter the source, review the preview when available, save the macro, and then publish or update the Confluence page.
Excalidraw Macro
Section titled “Excalidraw Macro”This macro helps you create figures, diagrams, and notes using Excalidraw. It’s a powerful tool for brainstorming and visualizing ideas. This plugin uses a built-in Excalidraw version, therefore, your data will not be seen or stored by excalidraw.com and will be securely kept in your Confluence instance.
Insert Excalidraw drawings
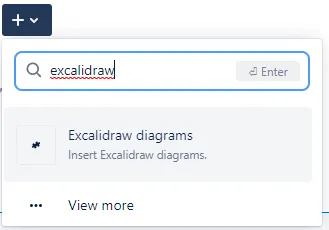
Section titled “Insert Excalidraw drawings”Select the Excalidraw diagrams macro from the macro list.
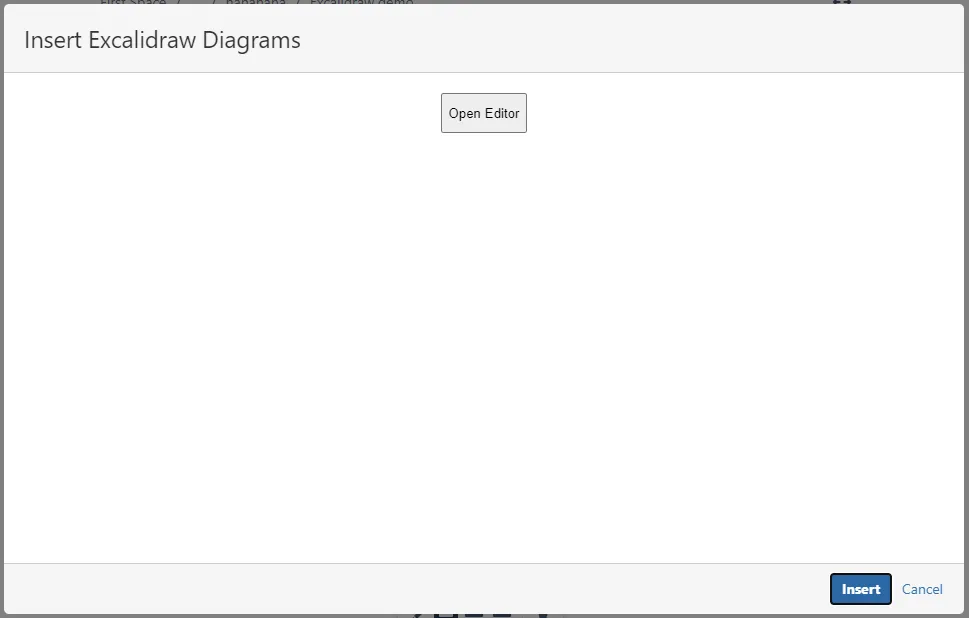
Click Open Editor.
Draw anything you want. To draw perfect shapes like a circle, hold the Shift button while drawing.
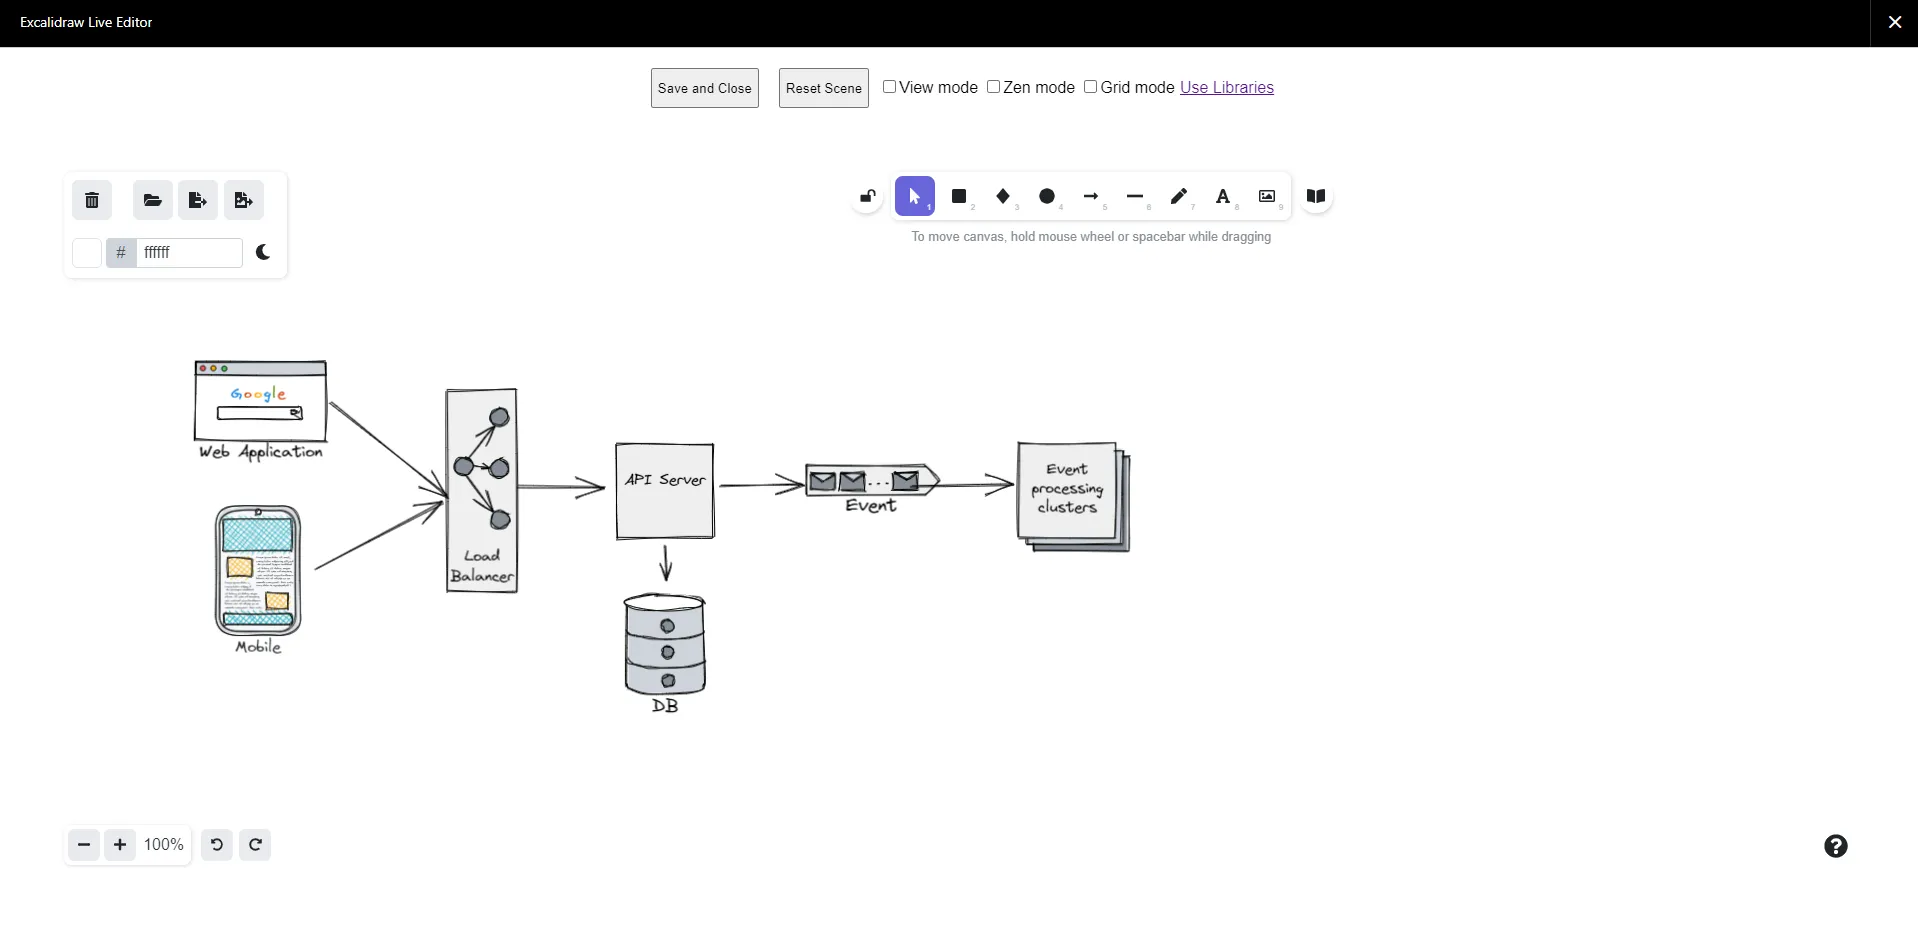
Click Save and Close, and wait until the drawing shows up in the dialog. If you don’t want to save the changes, click the X button on the top right corner.
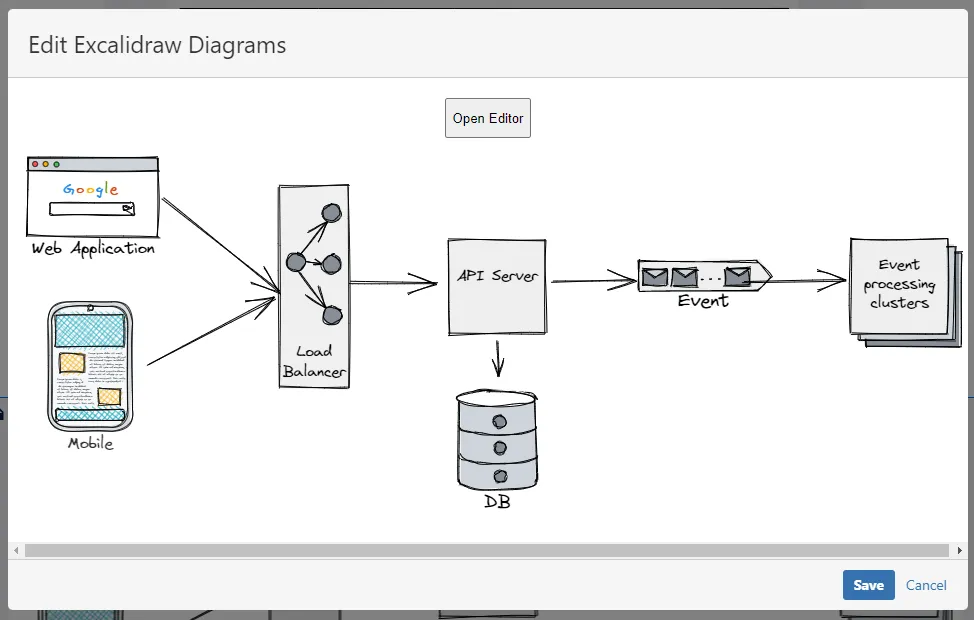
Click Insert (for new macro contents) or Save (for existing macro content).
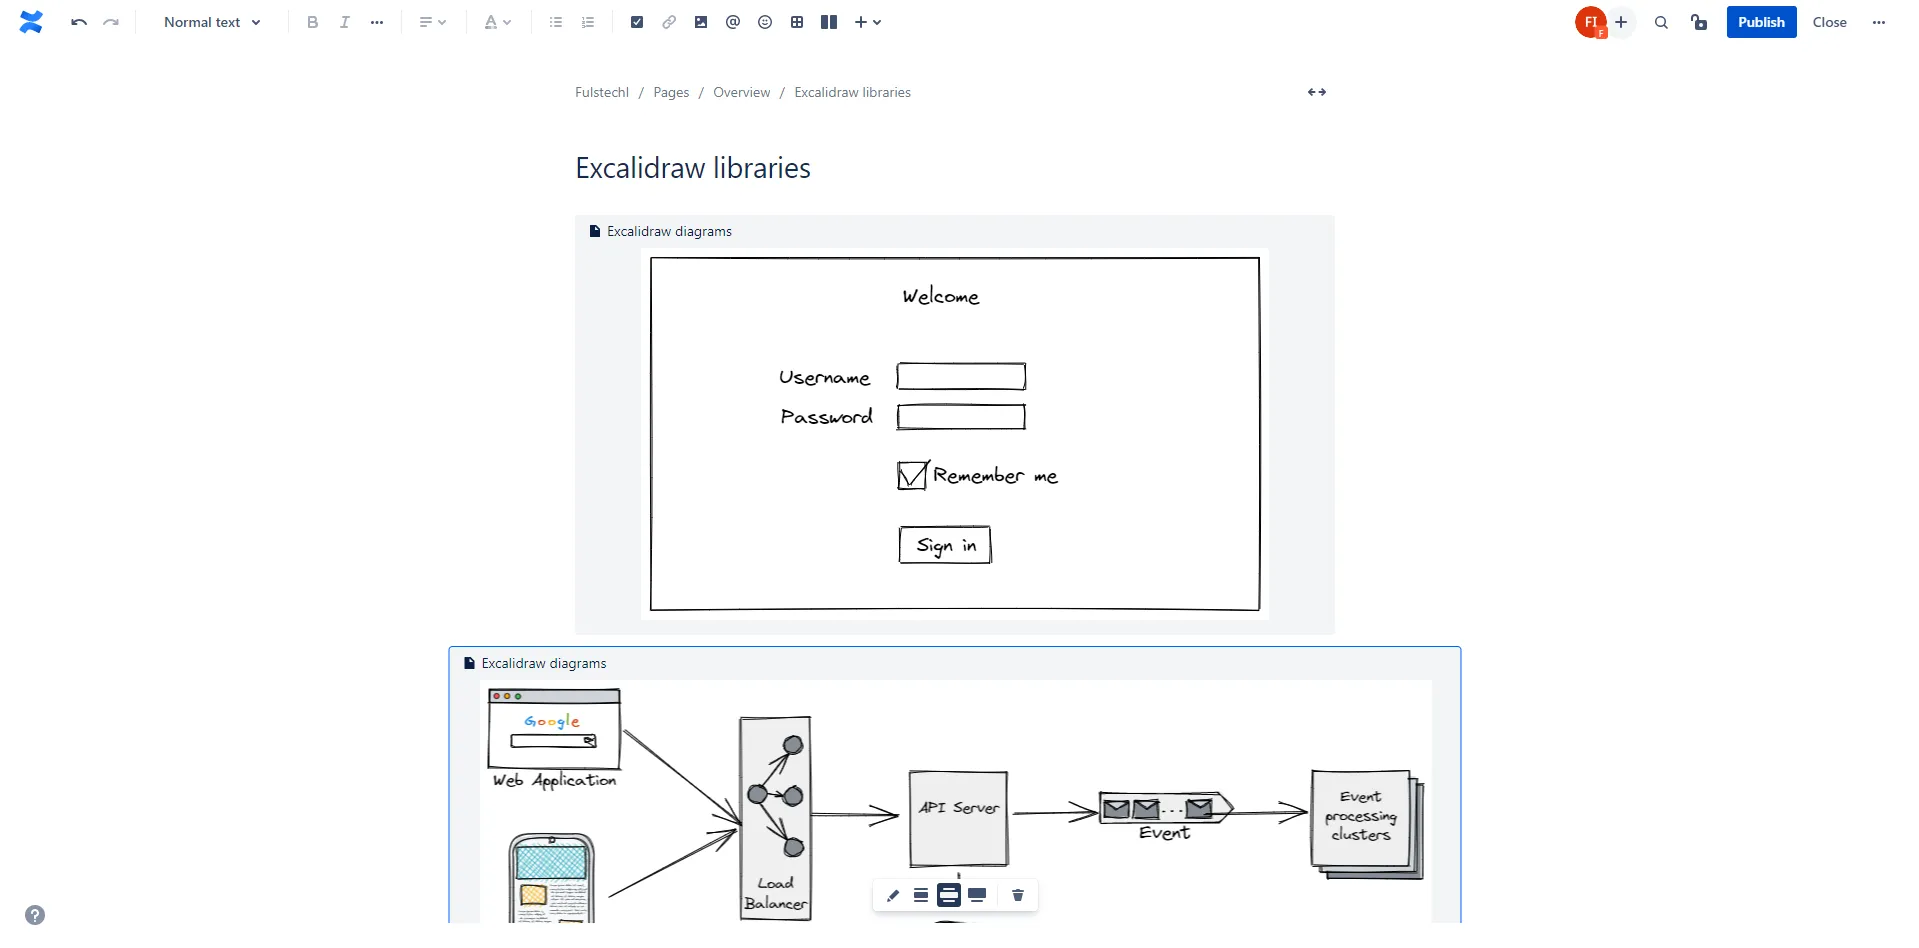
Adding new shapes from the Excalidraw Libraries website
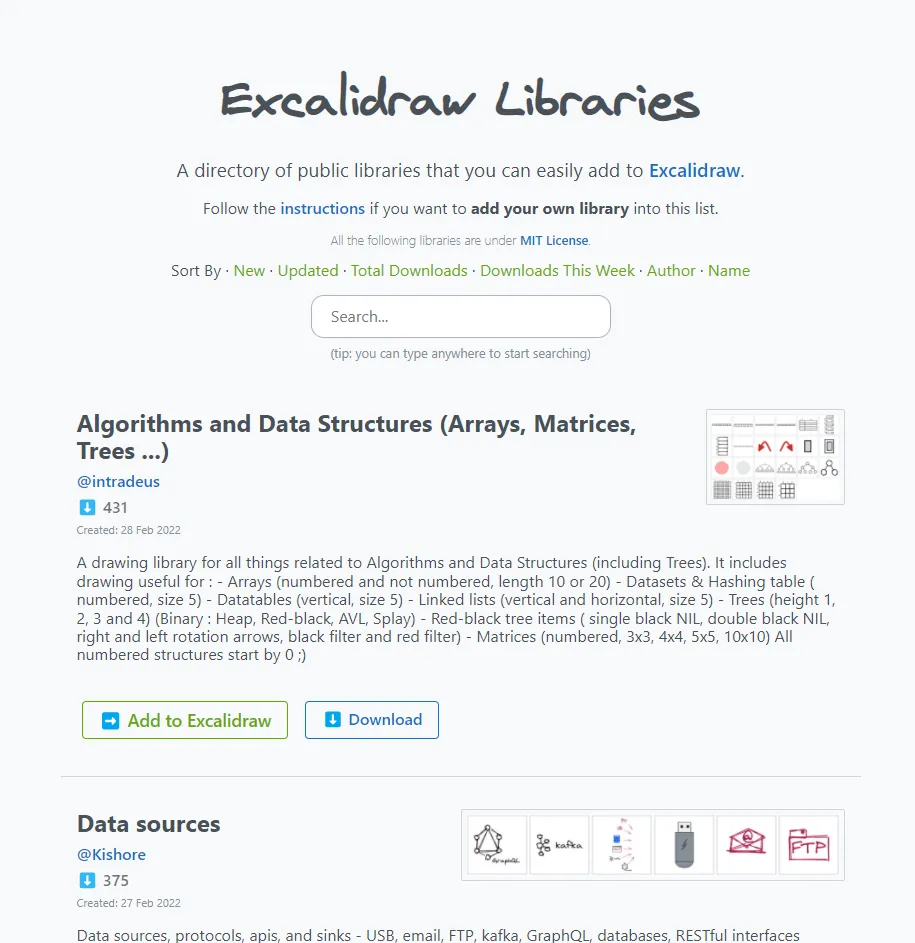
Section titled “Adding new shapes from the Excalidraw Libraries website”The Excalidraw Libraries website (https://libraries.excalidraw.com) provides a lot of useful shapes. These shapes are contributed by the community.
To add new shapes, visit the website and click the Download button to save the collection you need to your computer. The downloaded library file’s extension is .excalidrawlib.
Do not use the Add to Excalidraw button, as the library will not be added to the plugin-hosted Excalidraw Editor.
Open the Excalidraw Editor in Confluence, and upload the library file.
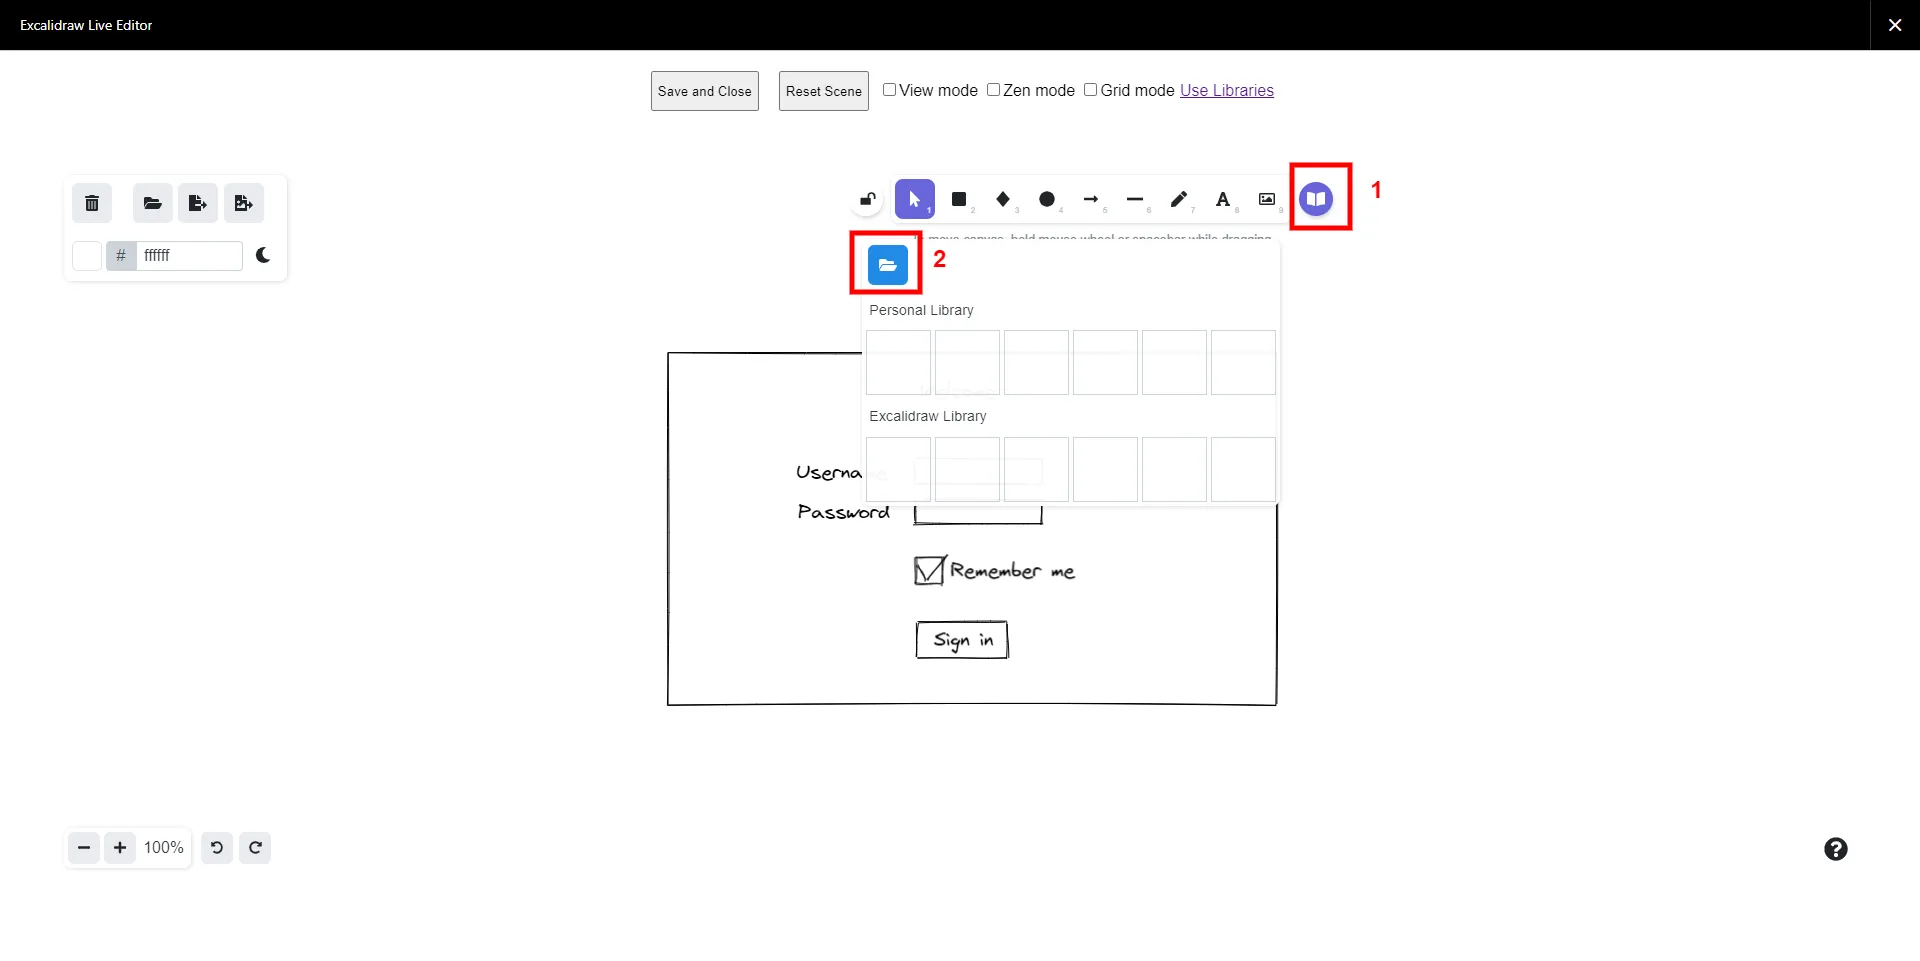
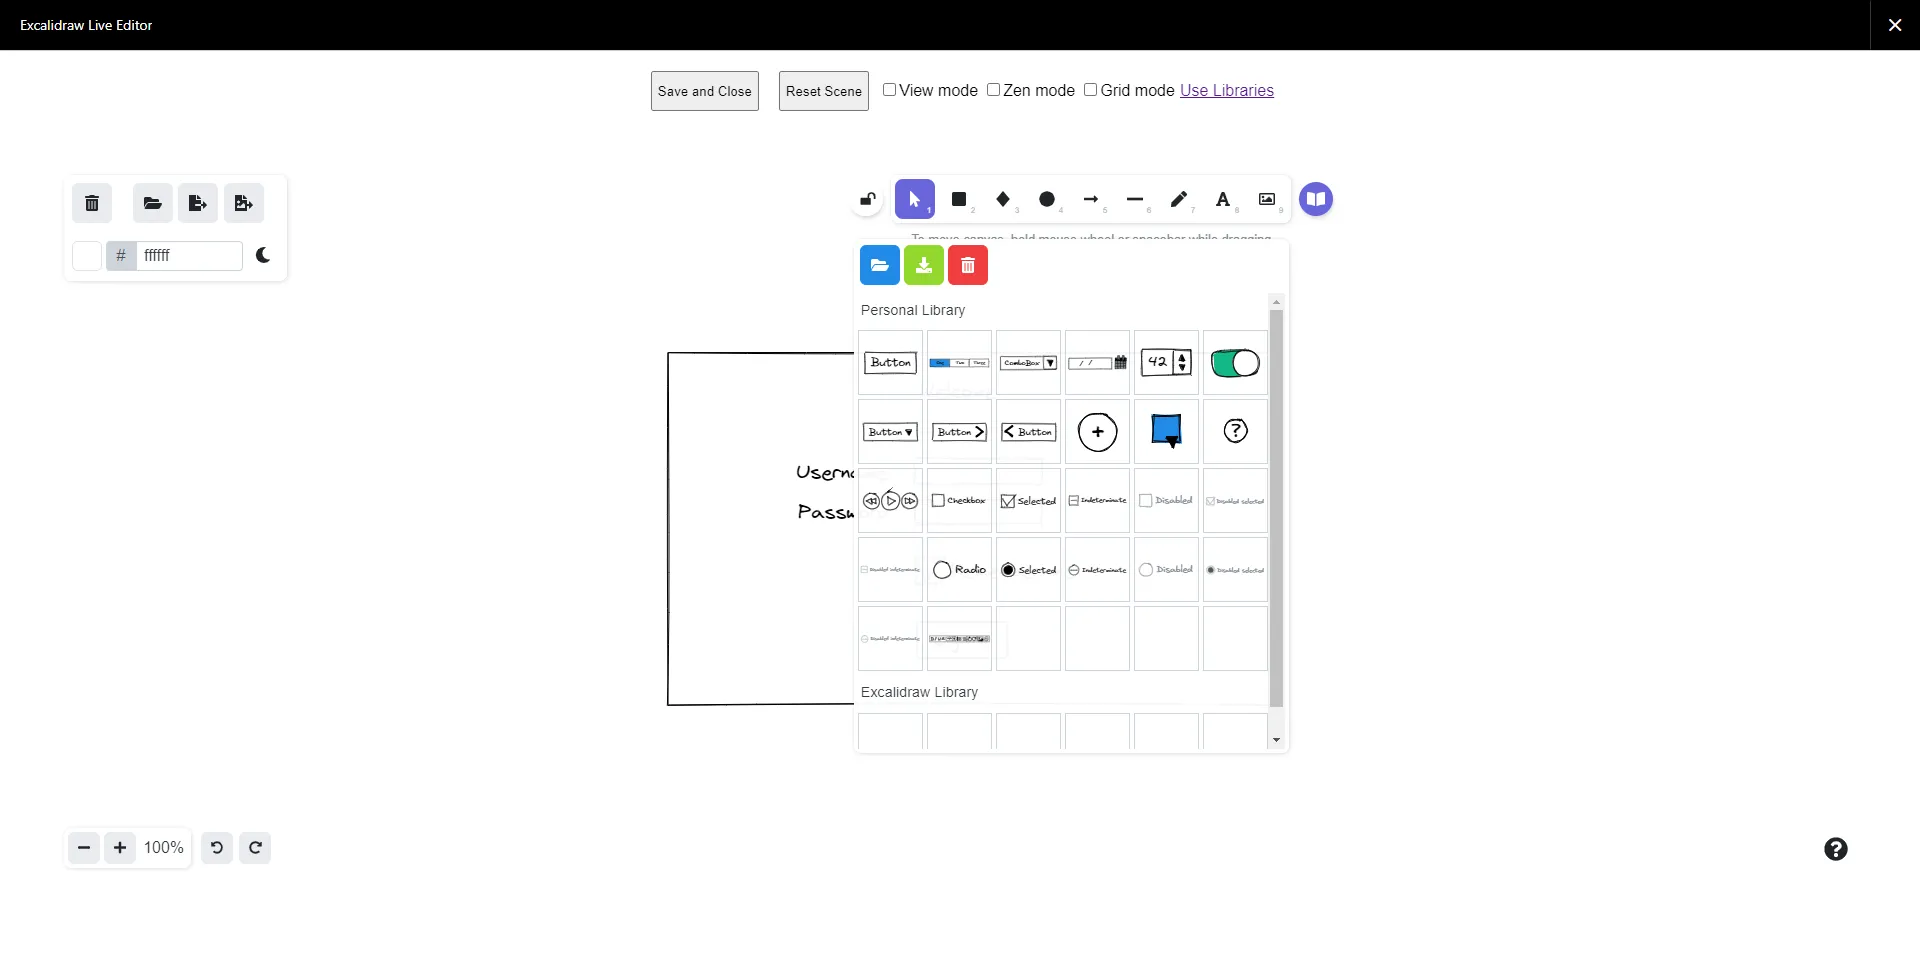
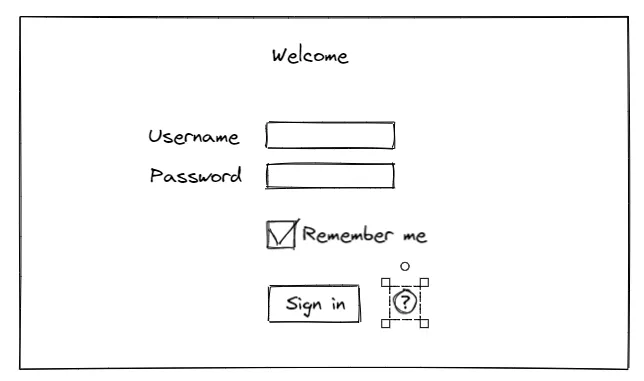
You can then drag and drop shapes into the canvas.
Saving shapes as libraries
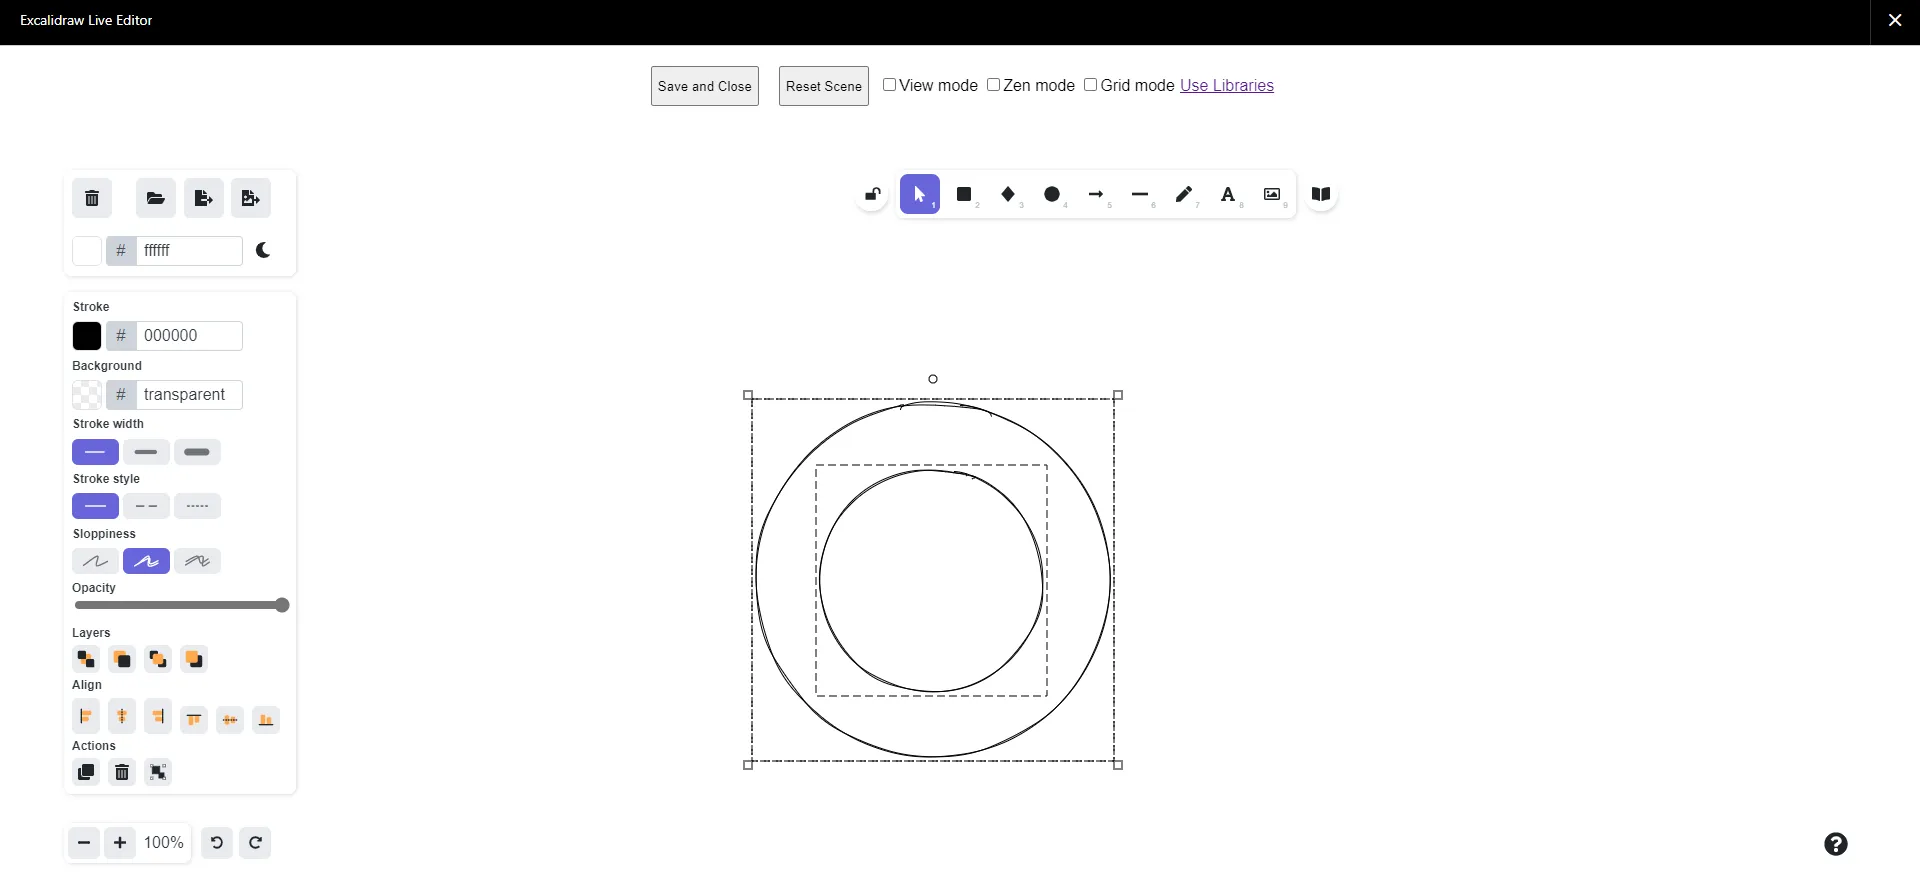
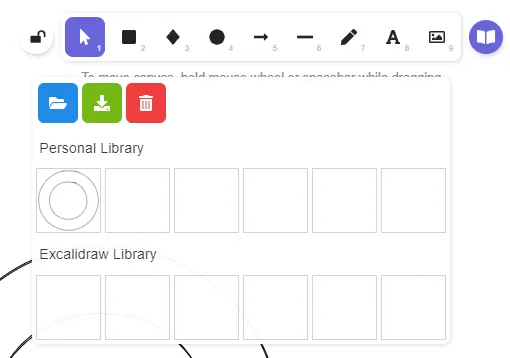
Section titled “Saving shapes as libraries”Let’s say we want to save the following doughnut shape to reuse later. The first step is to select the whole shape.
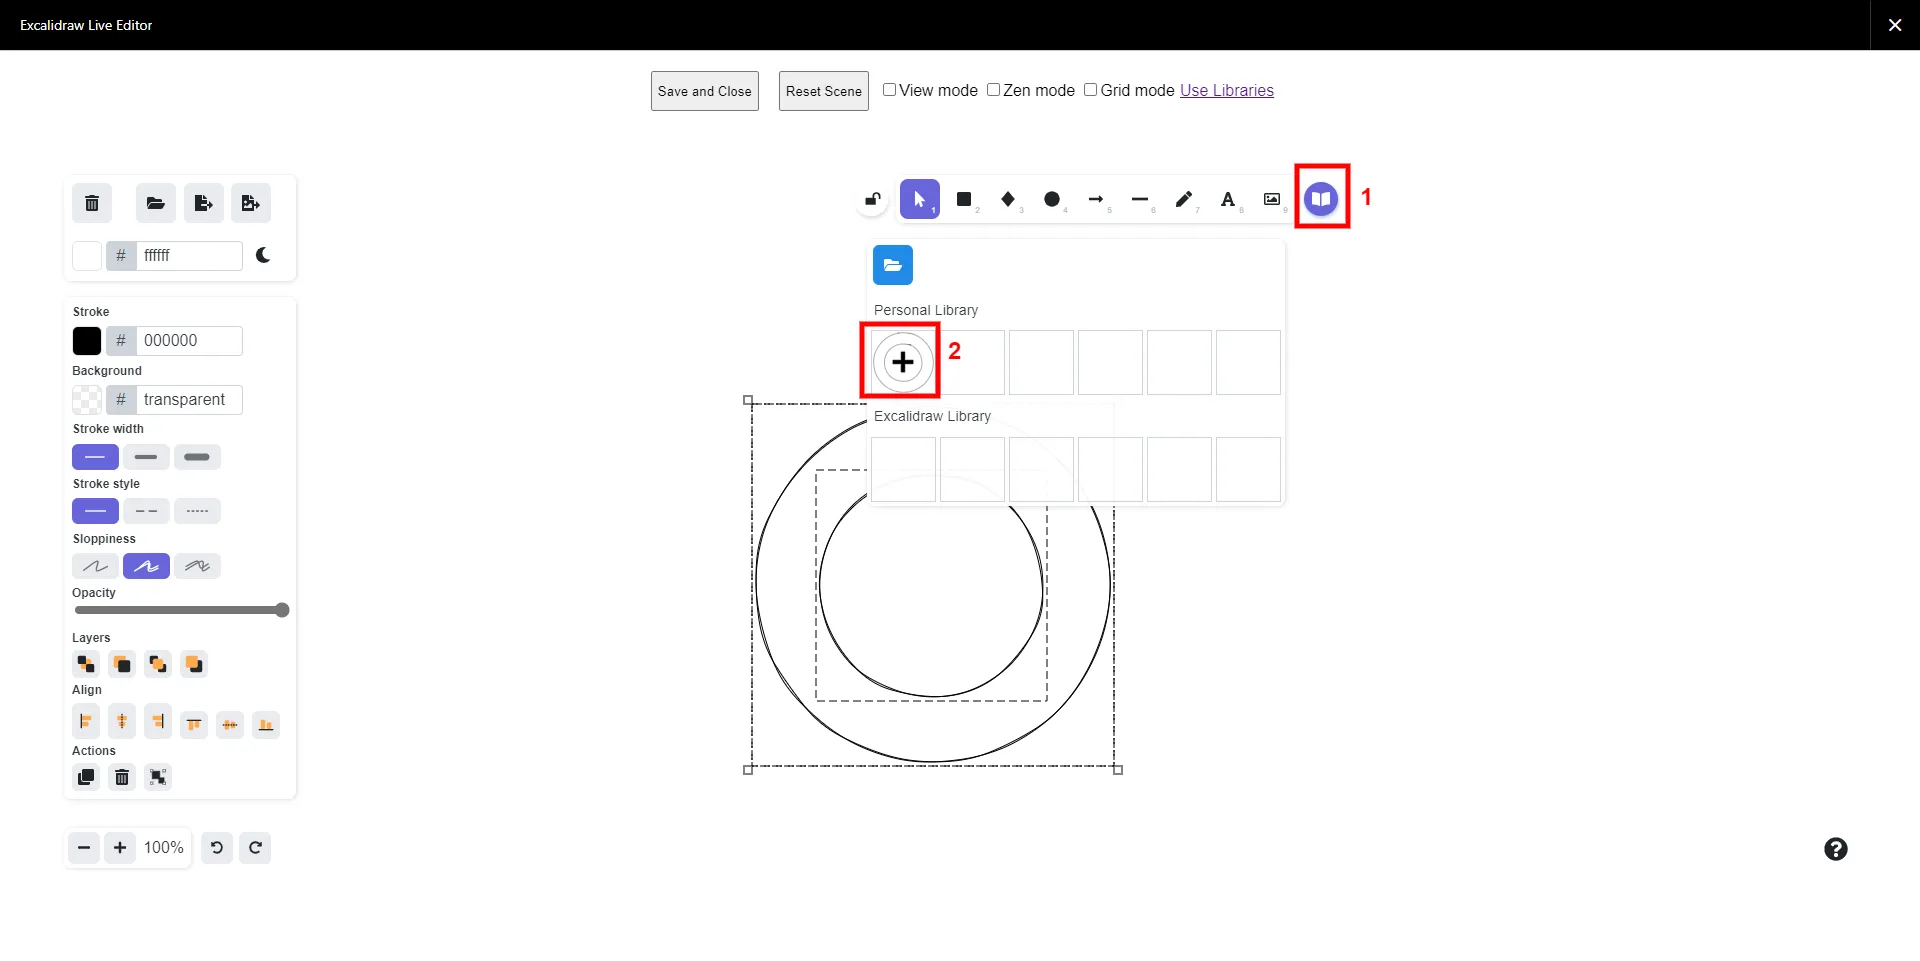
Add the selected shape to your library.
To save your library locally (for the backup purpose, for example), click the Export button.
Draw.io Integration Macro
Section titled “Draw.io Integration Macro”This macro helps you to use draw.io to create multiple kinds of advanced diagrams. The macro uses the embedded version of draw.io editor. If this is the first time you use draw.io, please check out their privacy policy.
Insert Draw.io drawings
Section titled “Insert Draw.io drawings”Select the DrawIO diagrams macro from the macro list.
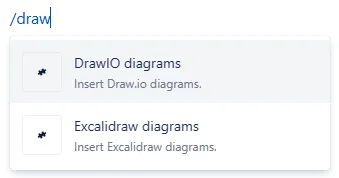
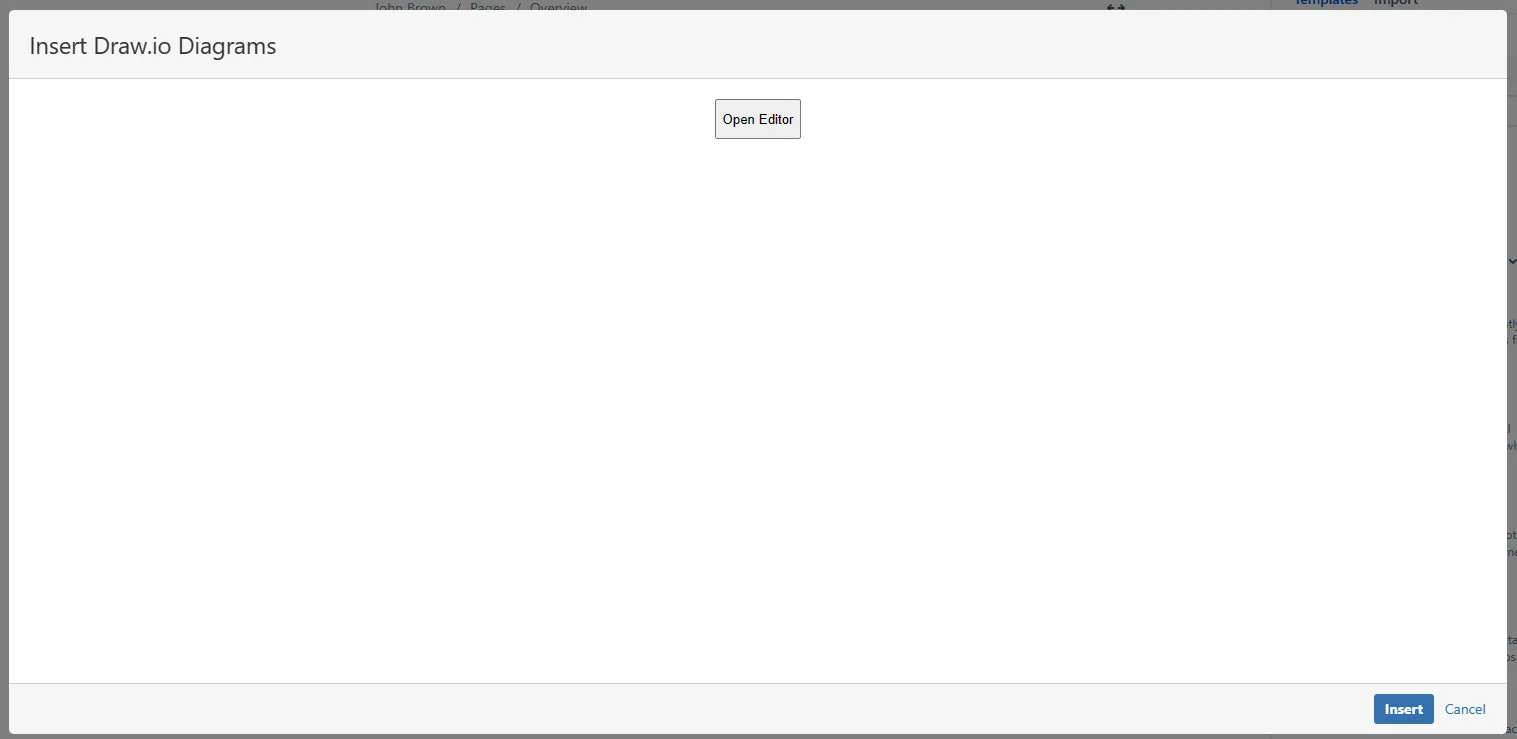
Click Open Editor.
Draw anything you want.
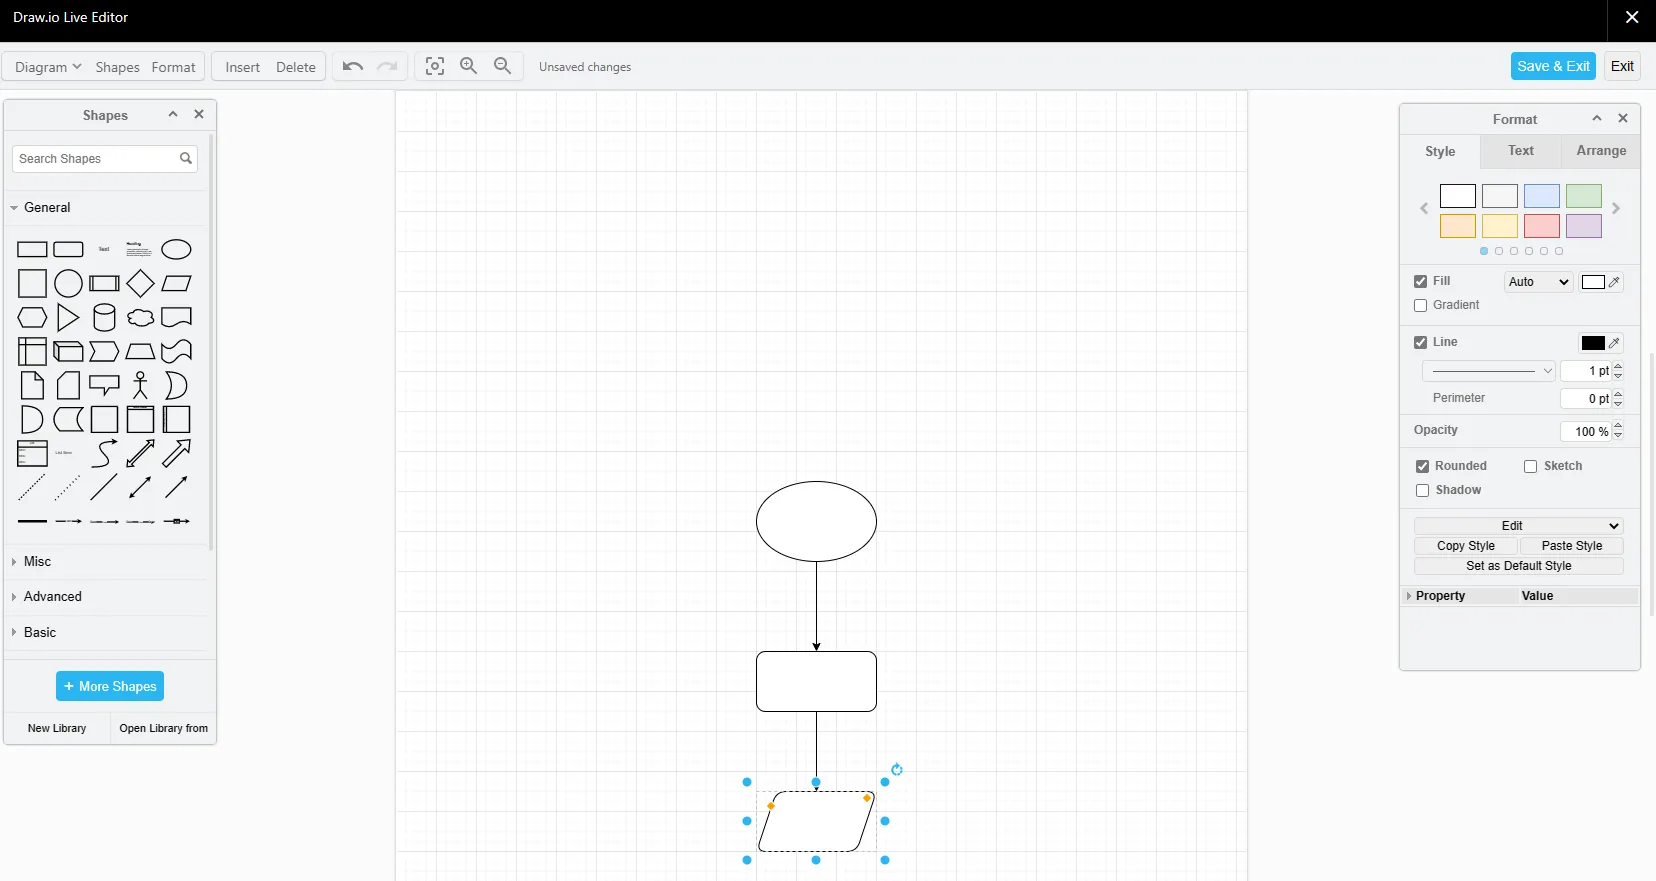
Click Save & Exit, and wait until the drawing shows up in the dialog. If you don’t want to save the changes, click Exit.
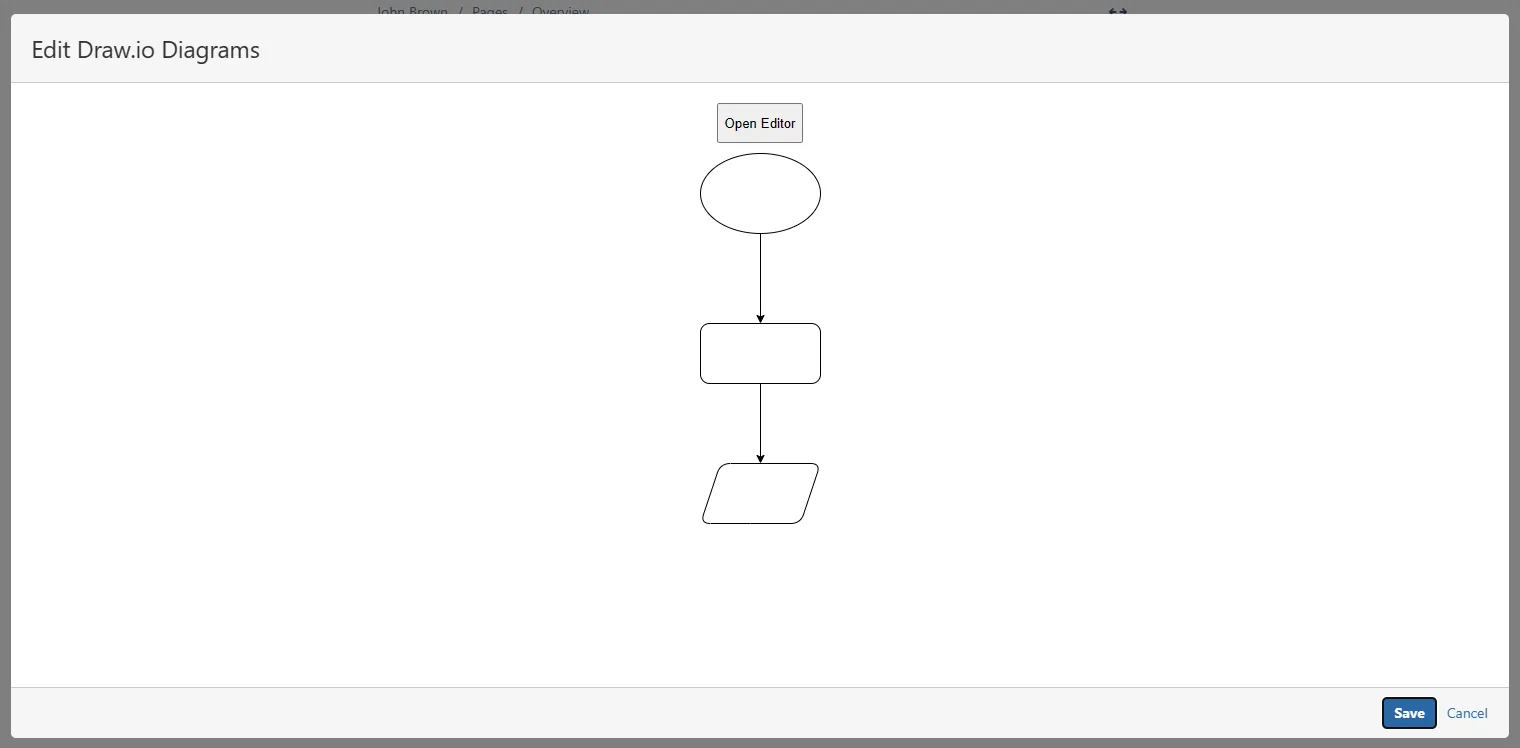
Click Insert (for new macro contents) or Save (for existing macro content).
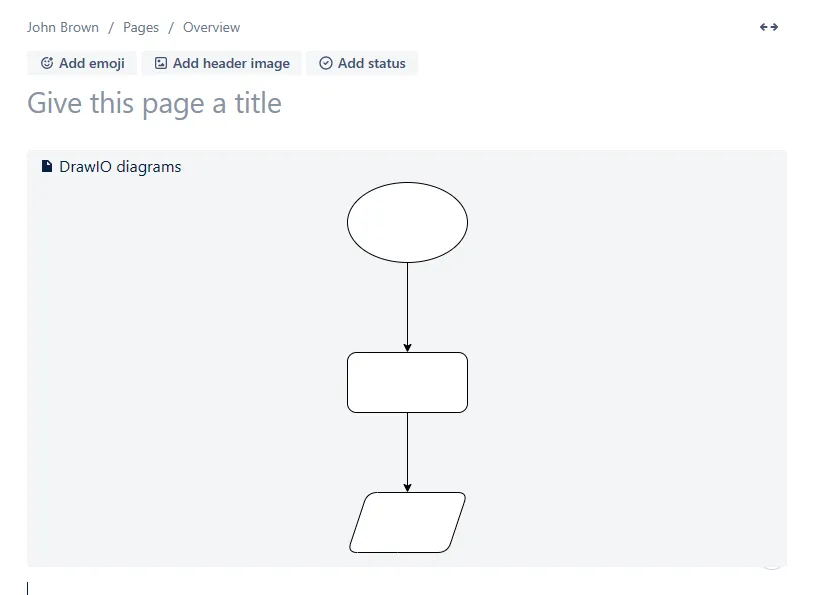
BPMN Macro
Section titled “BPMN Macro”This macro helps you create BPMN diagrams using a built-in version of bpmn.io. The data is securely kept in your Confluence instance and is not shared with bpmn.io.
Insert BPMN drawings
Section titled “Insert BPMN drawings”Select the BPMN diagrams macro from the macro list.
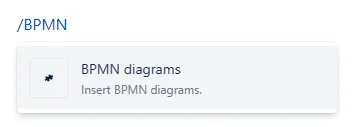
Click Open Editor.
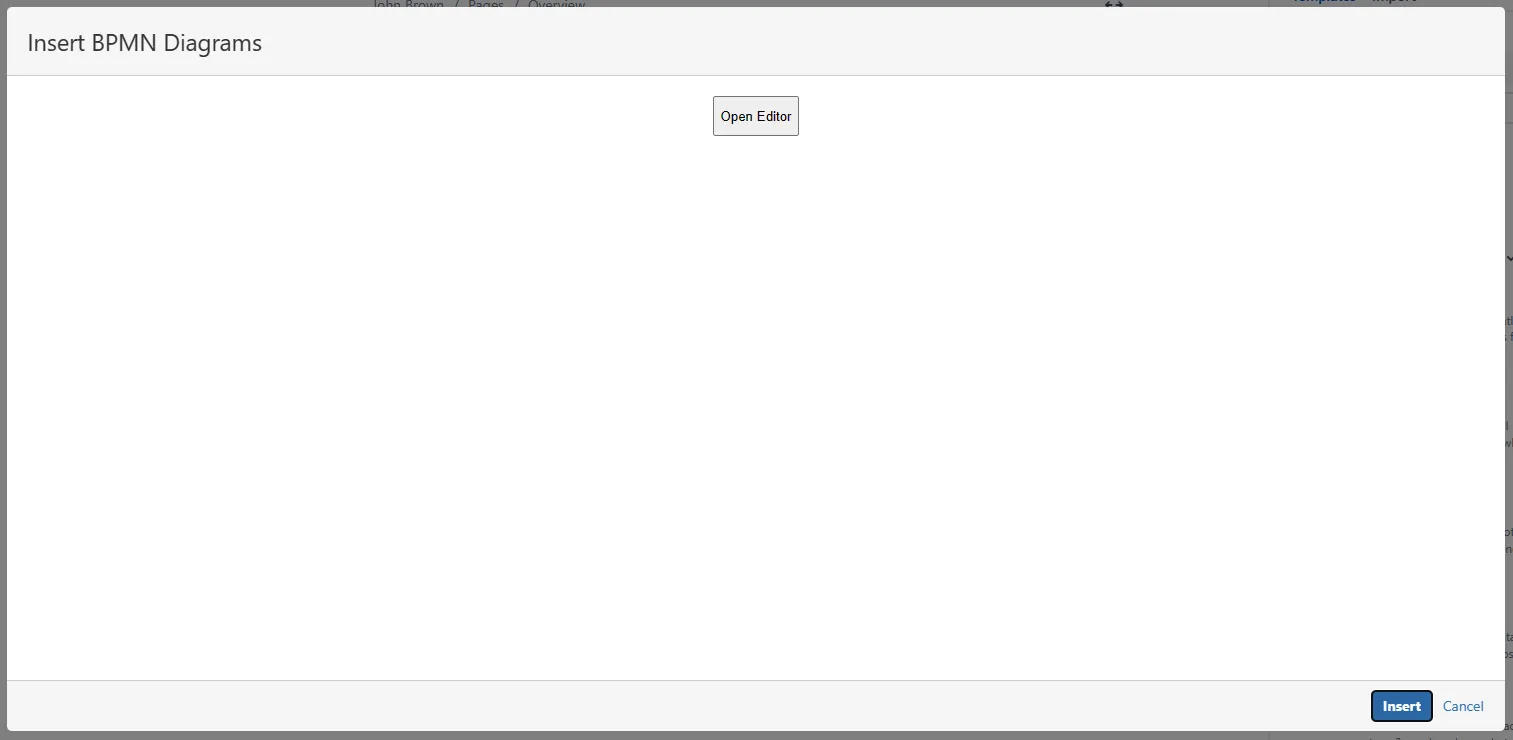
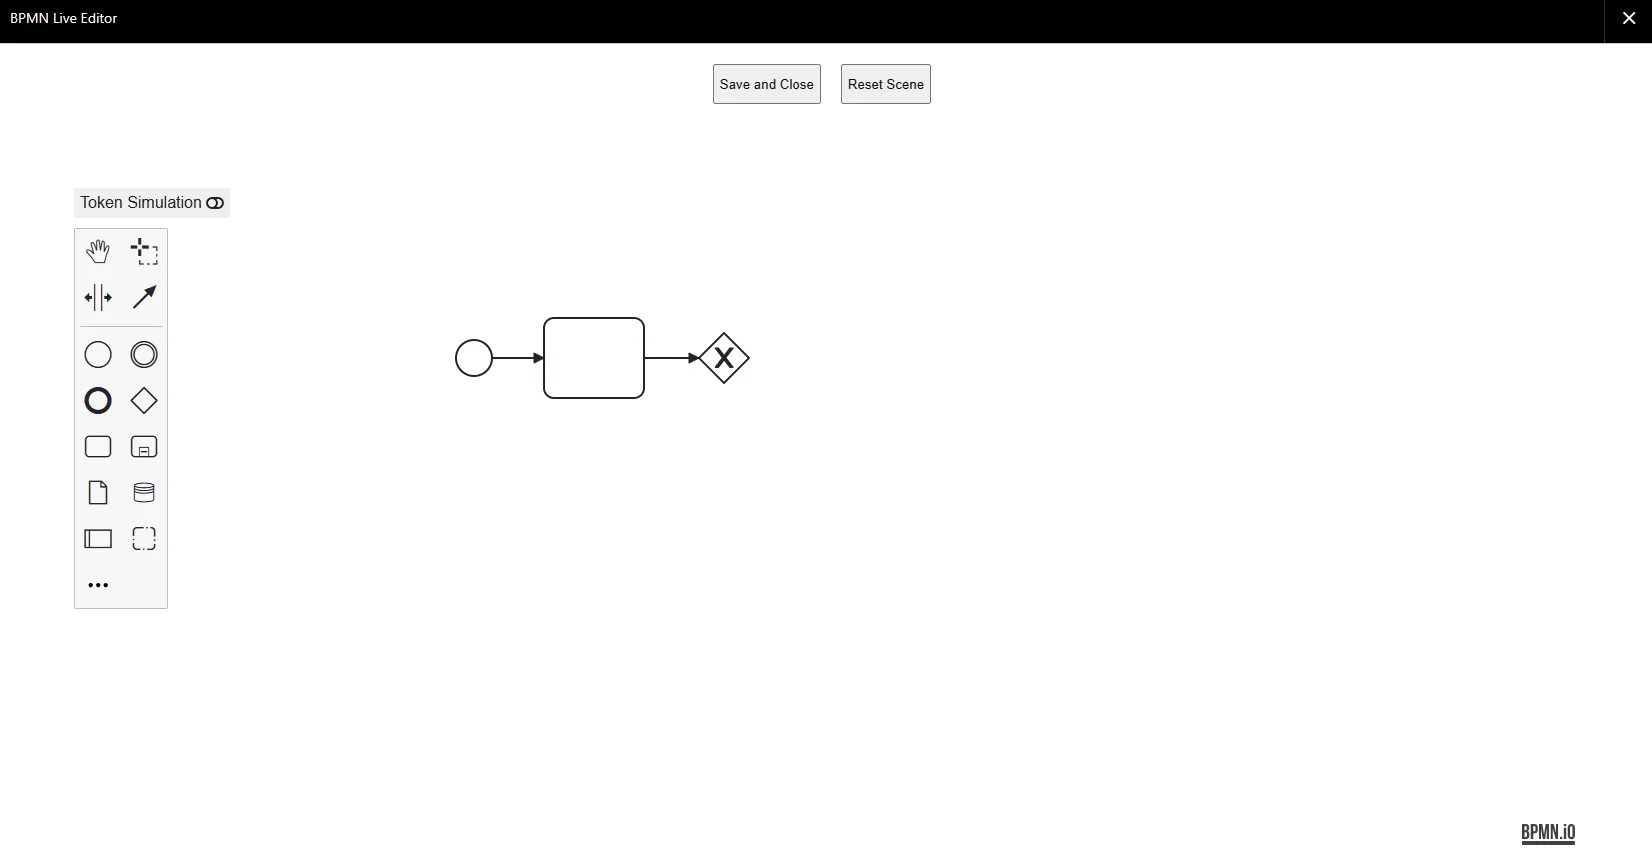
Click Save and Close, and wait until the drawing shows up in the dialog. If you don’t want to save the changes, click the X button on the top right corner.
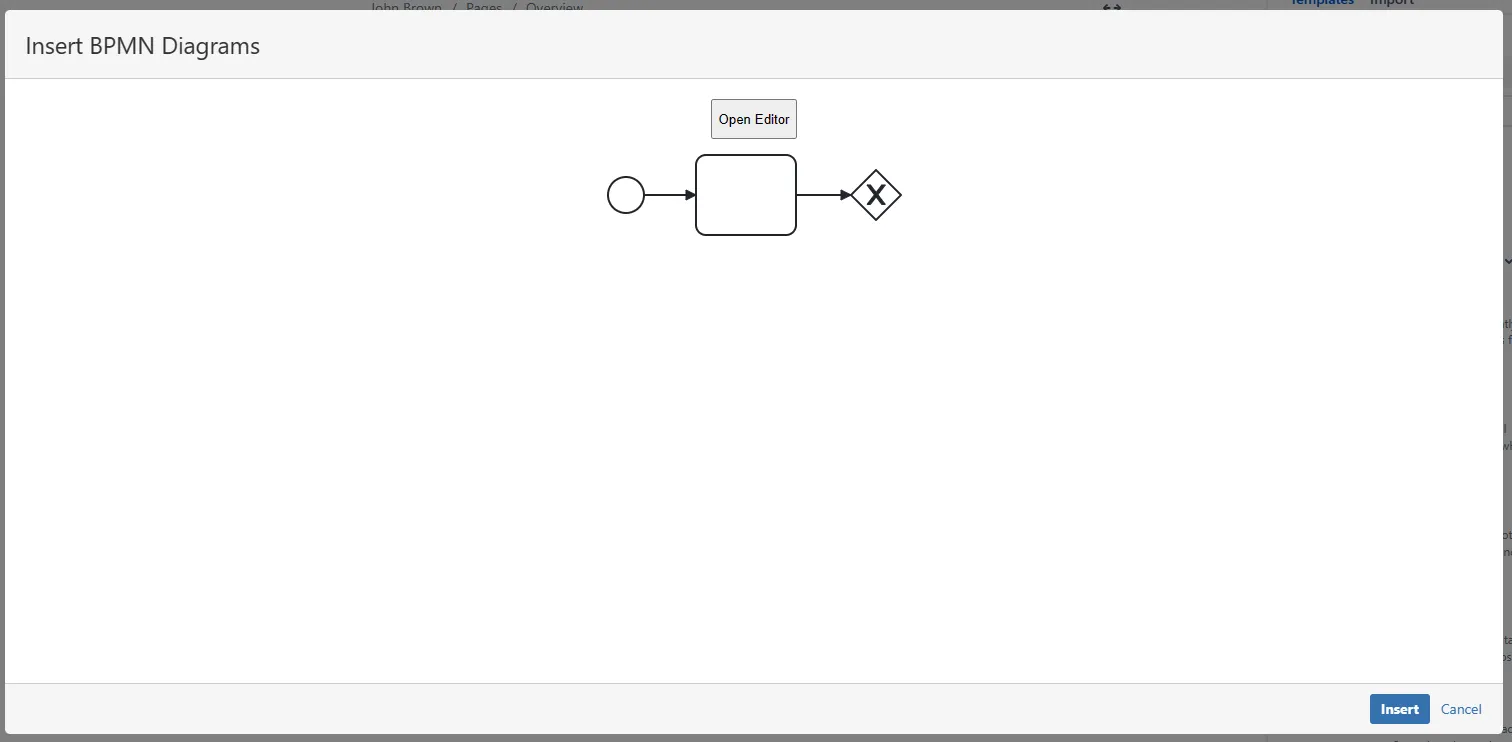
Click Insert (for new macro contents) or Save (for existing macro content).
Mermaid UML Diagrams Macro
Section titled “Mermaid UML Diagrams Macro”The Render Mermaid UML Diagrams macro uses Mermaid to render diagrams from readable text source.
You can draft source in the Mermaid Live Editor.
In the Confluence editor, open the Select macro dialog. The macro name is Render Mermaid UML Diagrams.
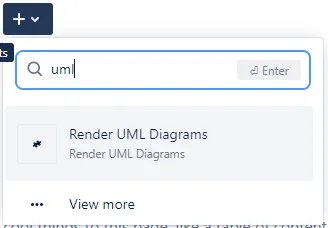
Alternatively, type / (slash) and select the macro.

A dialog will appear. Type the content of the UML diagram into the macro editor. Here is an example:
sequenceDiagram participant Alice participant Bob Alice->>John: Hello John, how are you? loop Healthcheck John->>John: Fight against hypochondria end Note right of John: Rational thoughts <br/>prevail! John-->>Alice: Great! John->>Bob: How about you? Bob-->>John: Jolly good!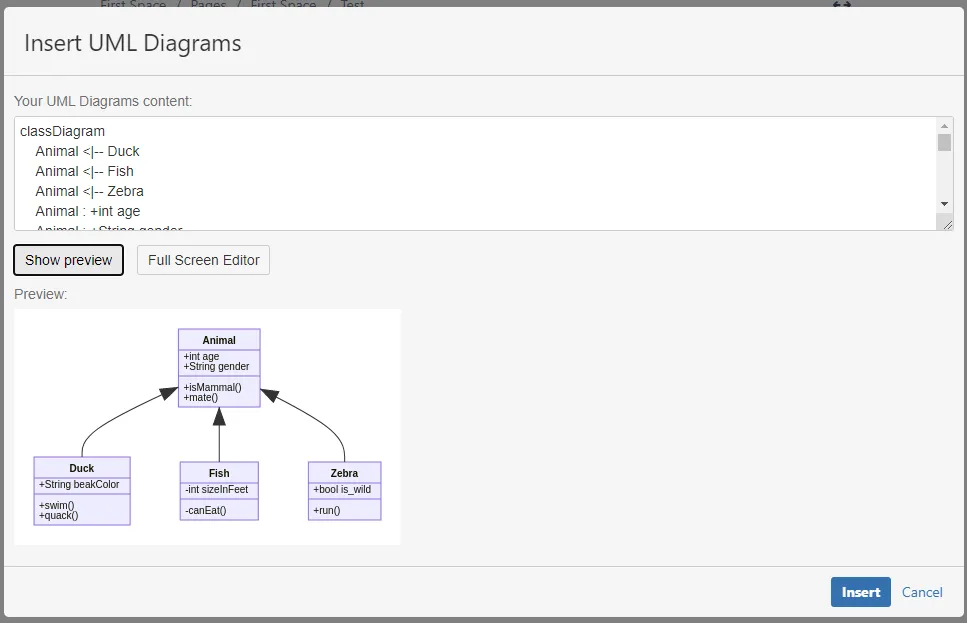
While editing, you can click Show preview to see the result. You can also click Full Screen Editor to open the Mermaid editor that will help you design new diagrams easily.
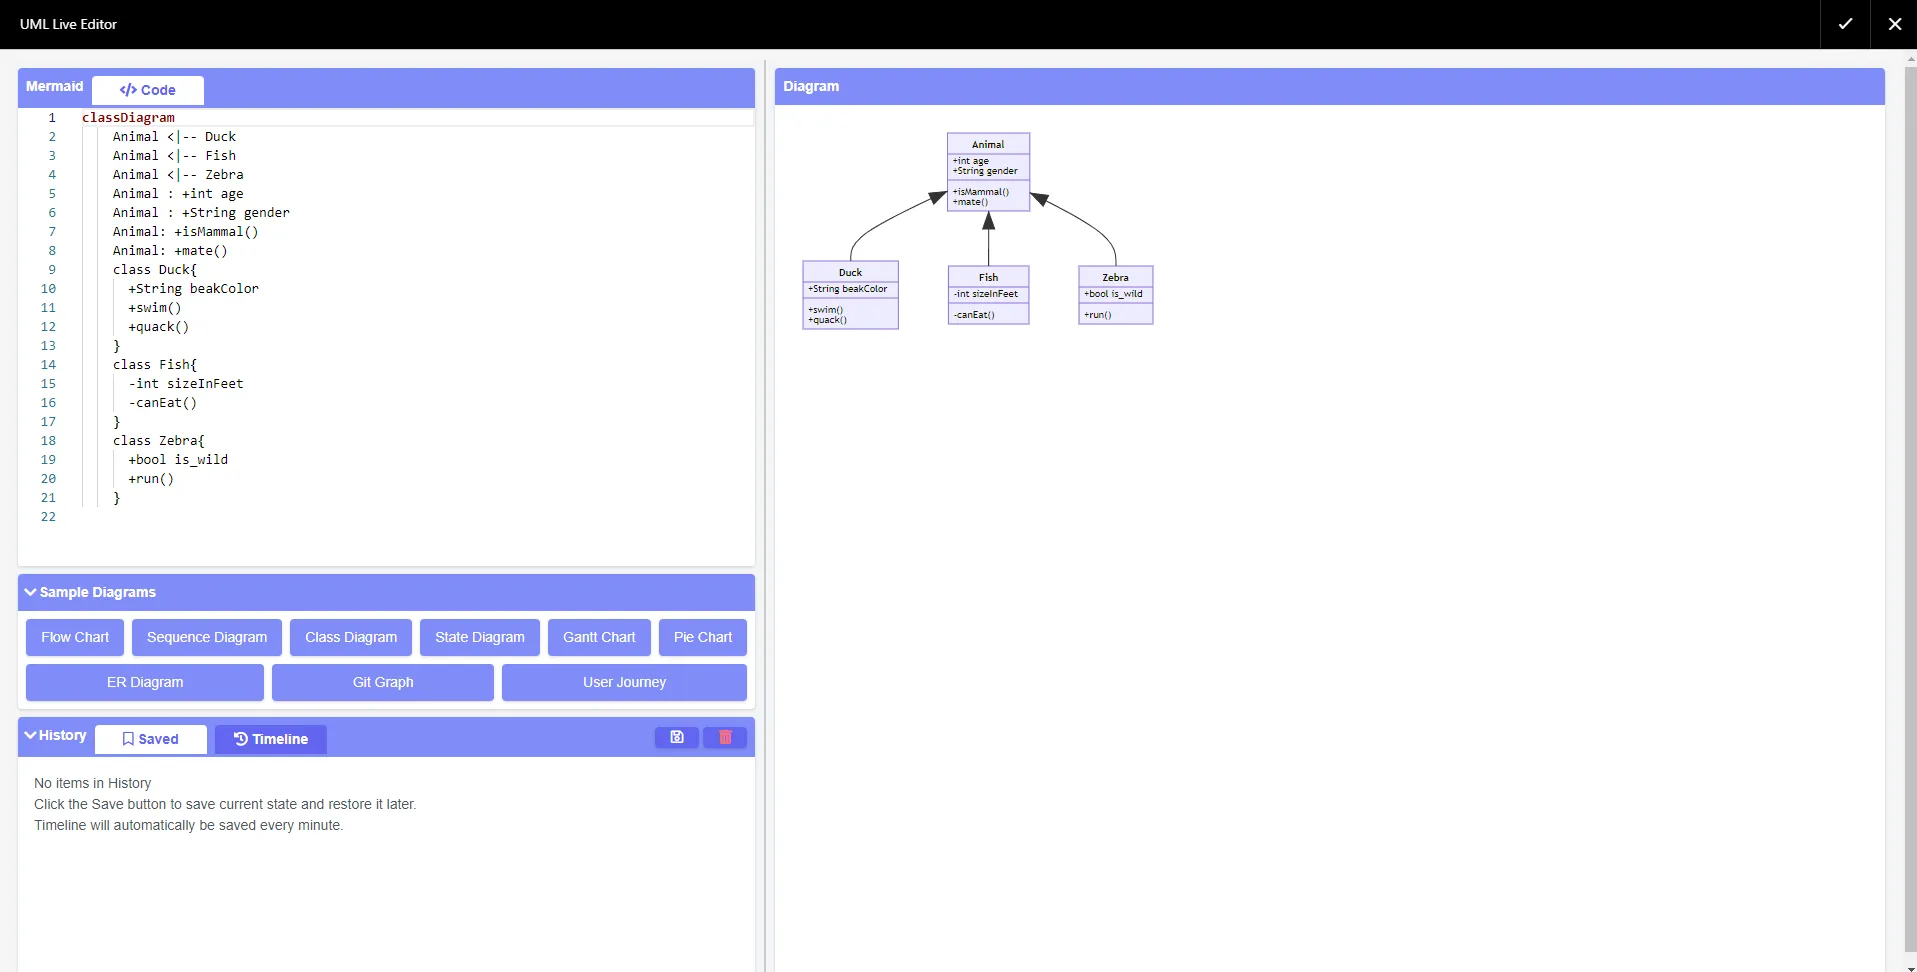
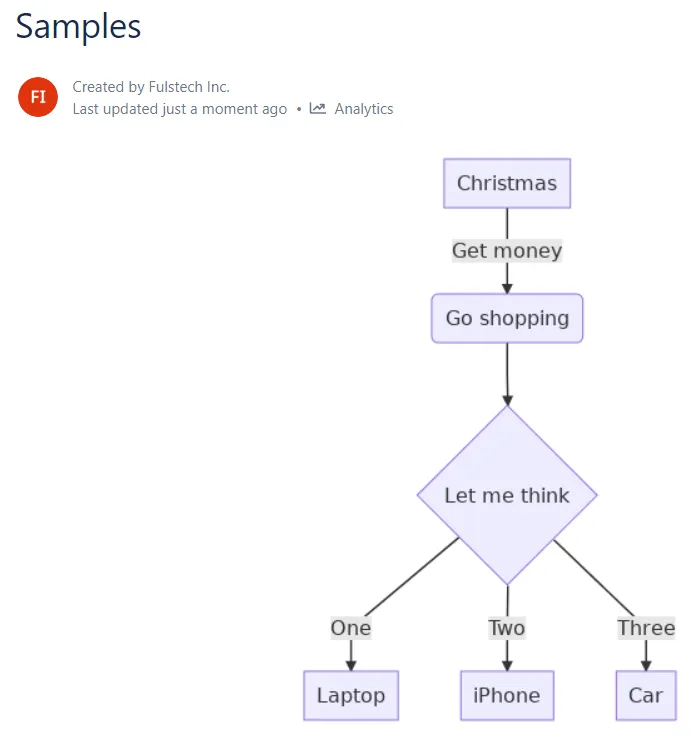
Save the page, and the UML diagram will be rendered.
PlantUML Diagrams Macro
Section titled “PlantUML Diagrams Macro”The Render PlantUML Diagrams macro (https://plantuml.com/) uses PlantUML to render UML diagrams. It allows you to define UML diagrams in plain-text format just like Markdown.
You can draft source in the PlantUML online server.
In the Confluence editor, open the Select macro dialog. The macro name is Render PlantUML Diagrams.
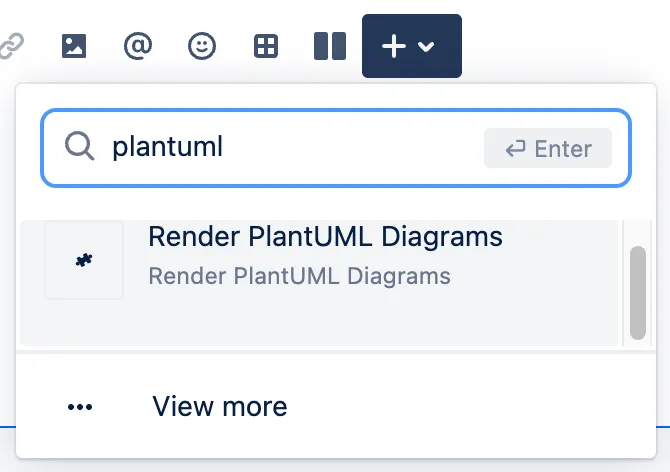
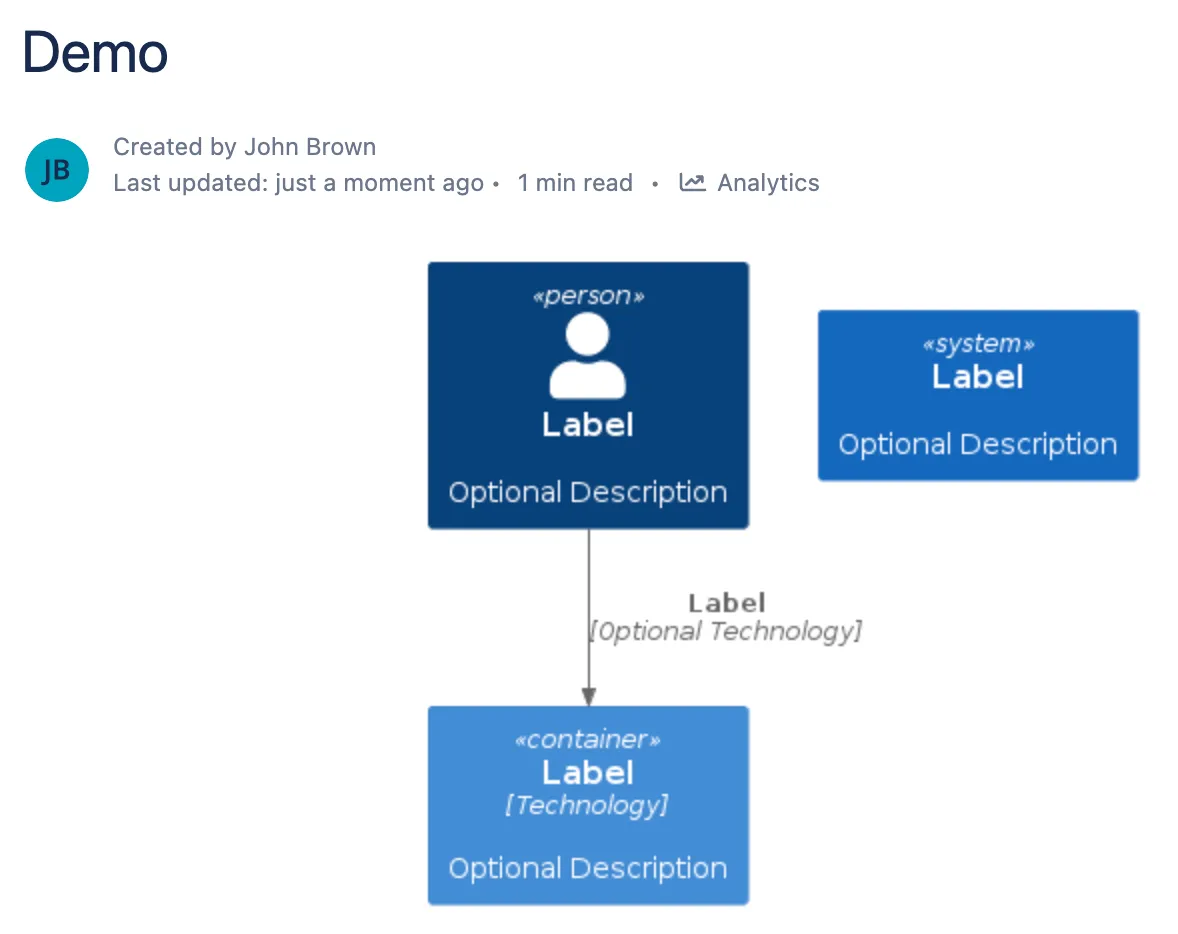
A dialog will appear. Type the content of the UML diagram into the macro editor. Here is an example:
@startuml C4_Elements!include https://raw.githubusercontent.com/plantuml-stdlib/C4-PlantUML/master/C4_Container.puml
Person(personAlias, "Label", "Optional Description")Container(containerAlias, "Label", "Technology", "Optional Description")System(systemAlias, "Label", "Optional Description")
Rel(personAlias, containerAlias, "Label", "Optional Technology")@enduml
See the PlantUML documentation and language reference for more examples.
Save the macro, and the UML diagram will be rendered.
Graphviz Diagrams Macro
Section titled “Graphviz Diagrams Macro”Graphviz renders graphs from DOT source. Use it for dependency maps, relationship diagrams, and layouts that should be calculated from nodes and edges.
See the official Graphviz gallery for more DOT examples.
In the Confluence editor, open the Select macro dialog. The macro name is Render Graphviz Diagrams.
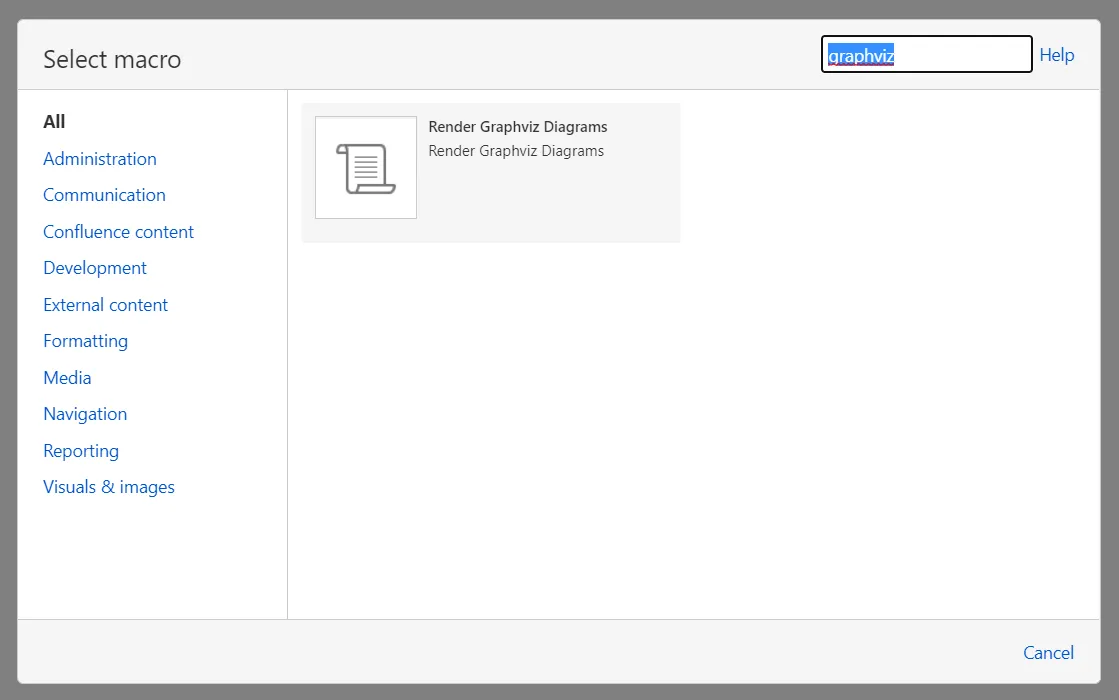
Select the macro, then click Insert.
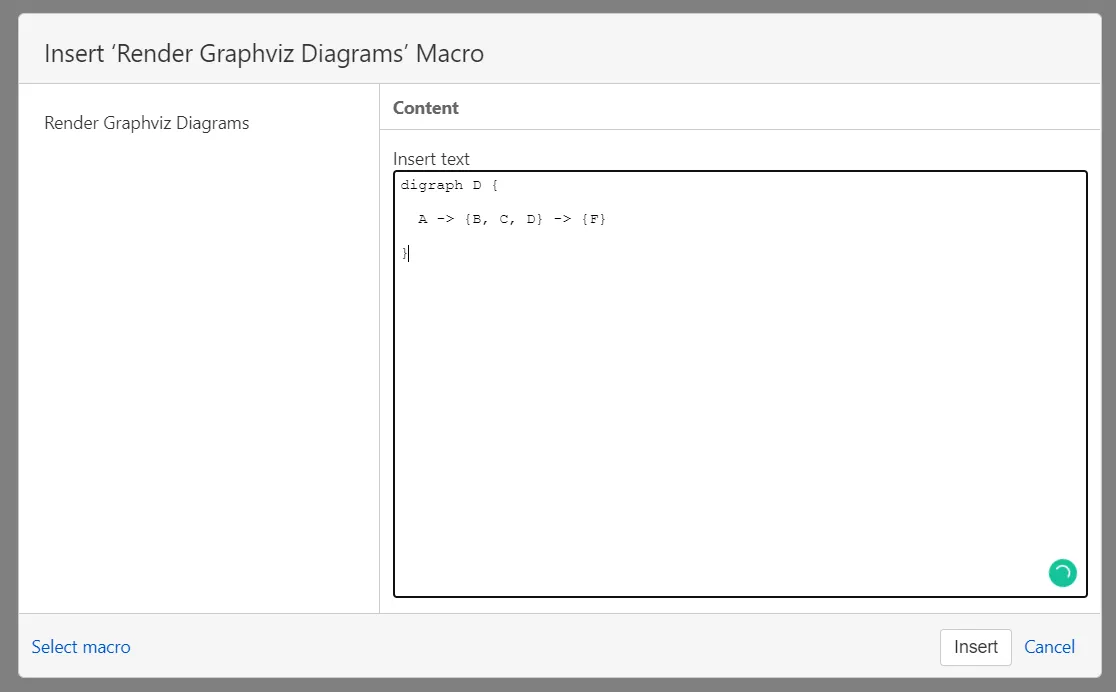
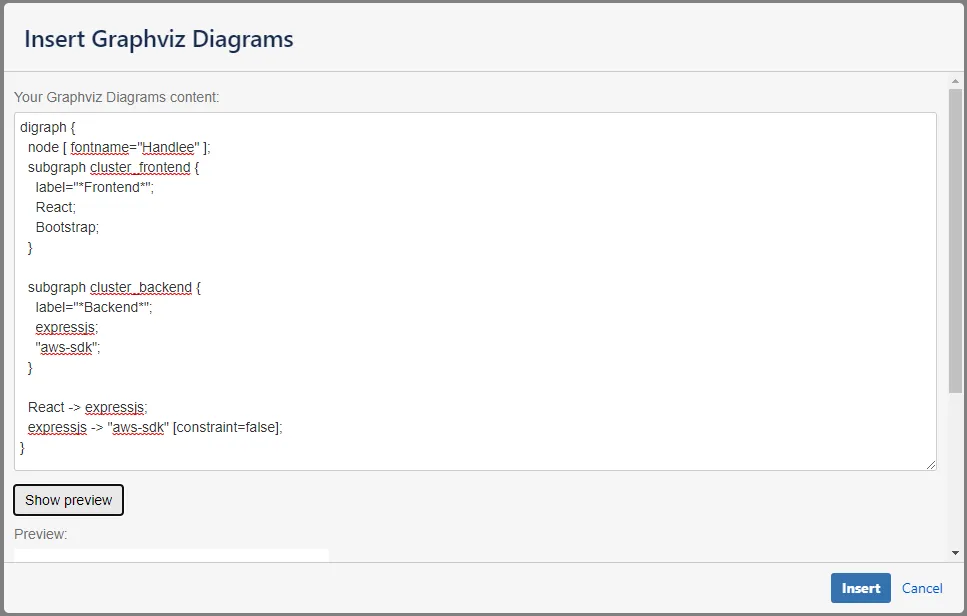
Type the content of the Graphviz diagram into the macro editor. Here is an example:
graph { a -- b; b -- c; a -- c; d -- c; e -- c; e -- a;}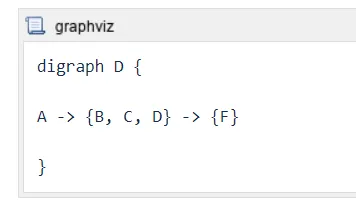
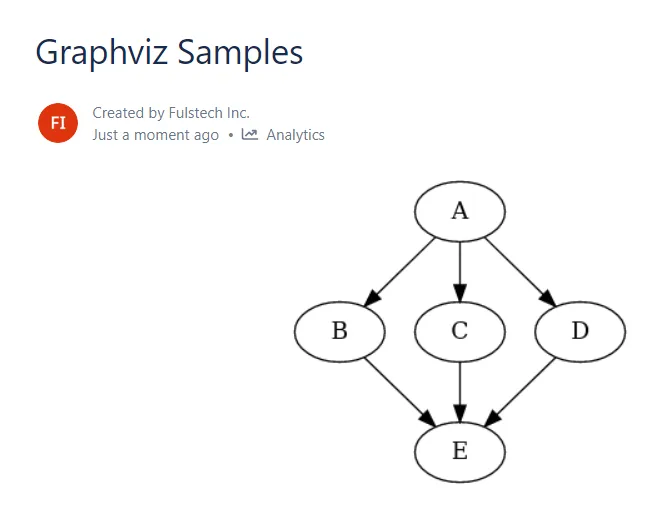
Save the page, and the Graphviz diagram will be rendered.
Mind Map
Section titled “Mind Map”Select the Mind Map macro from the macro list.
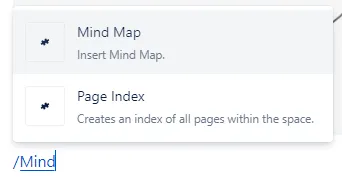
Click Open Editor.
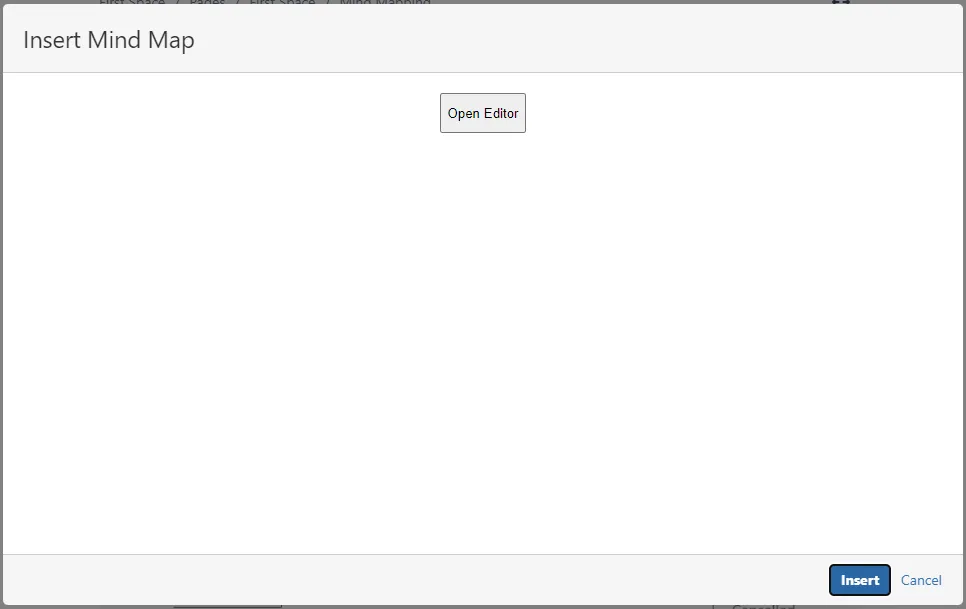
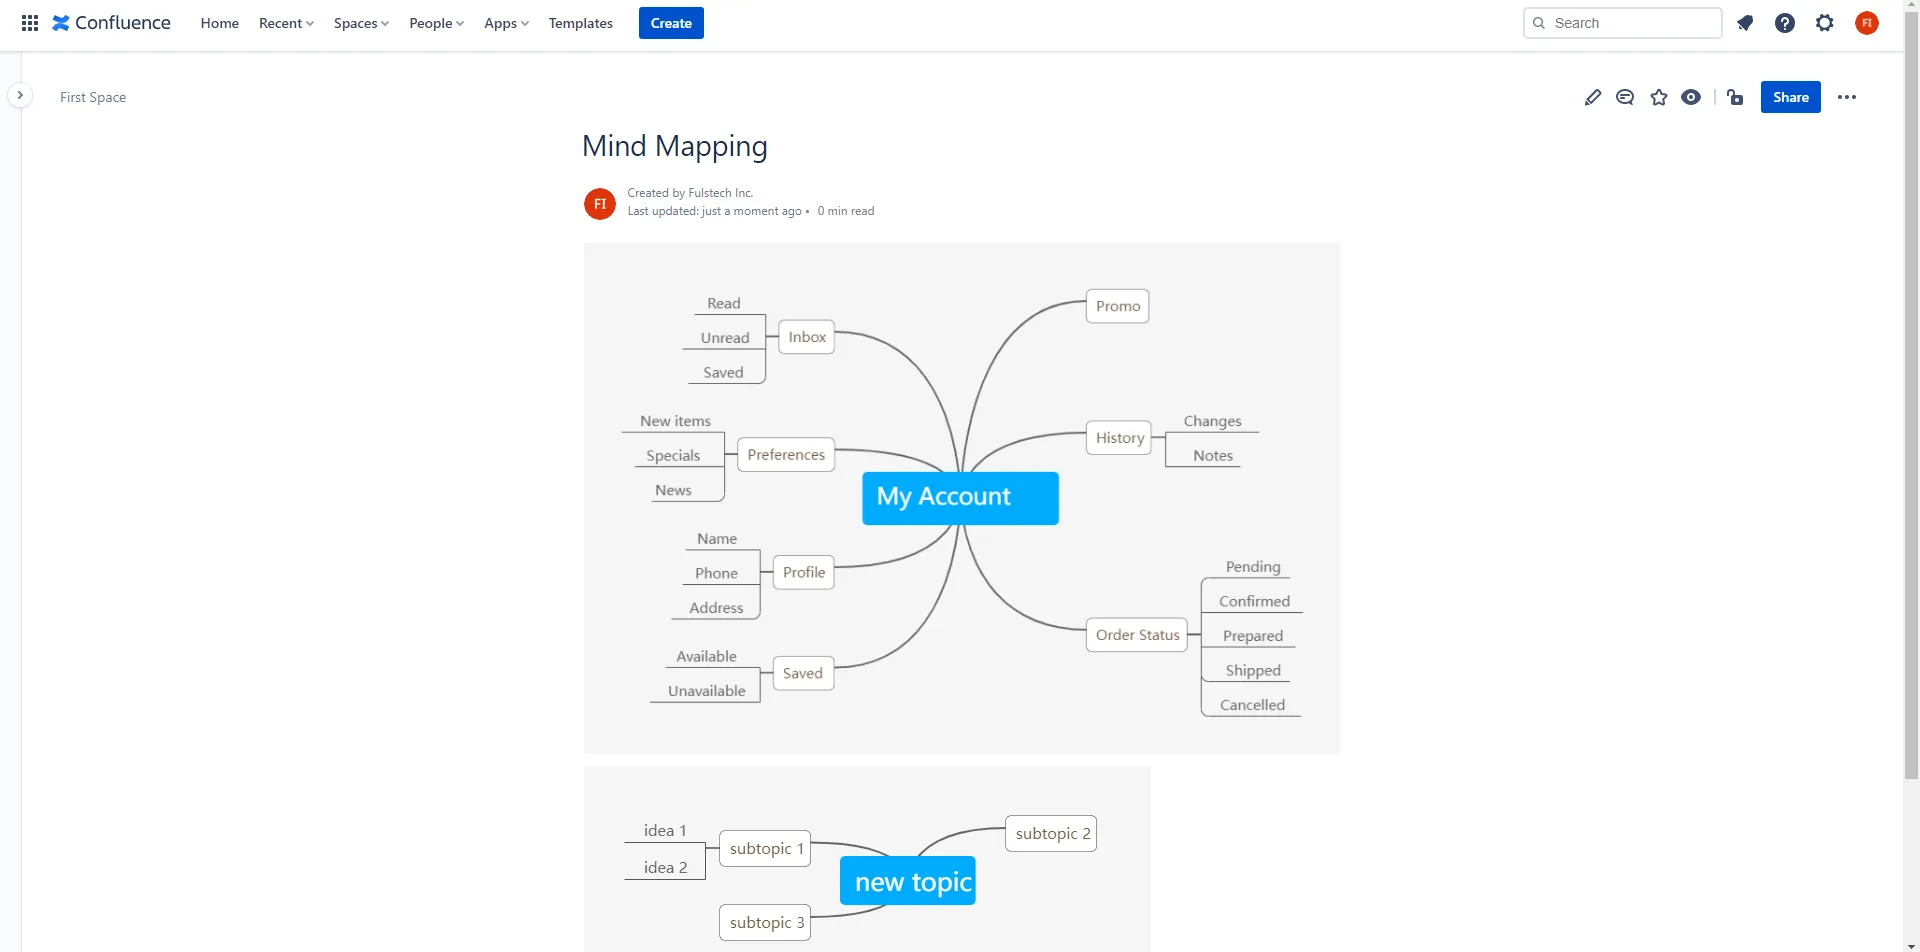
The Mind Map Editor now opens and you can start brainstorming! To create a subtopic, use Tab. To create a sibling topic, use Enter.
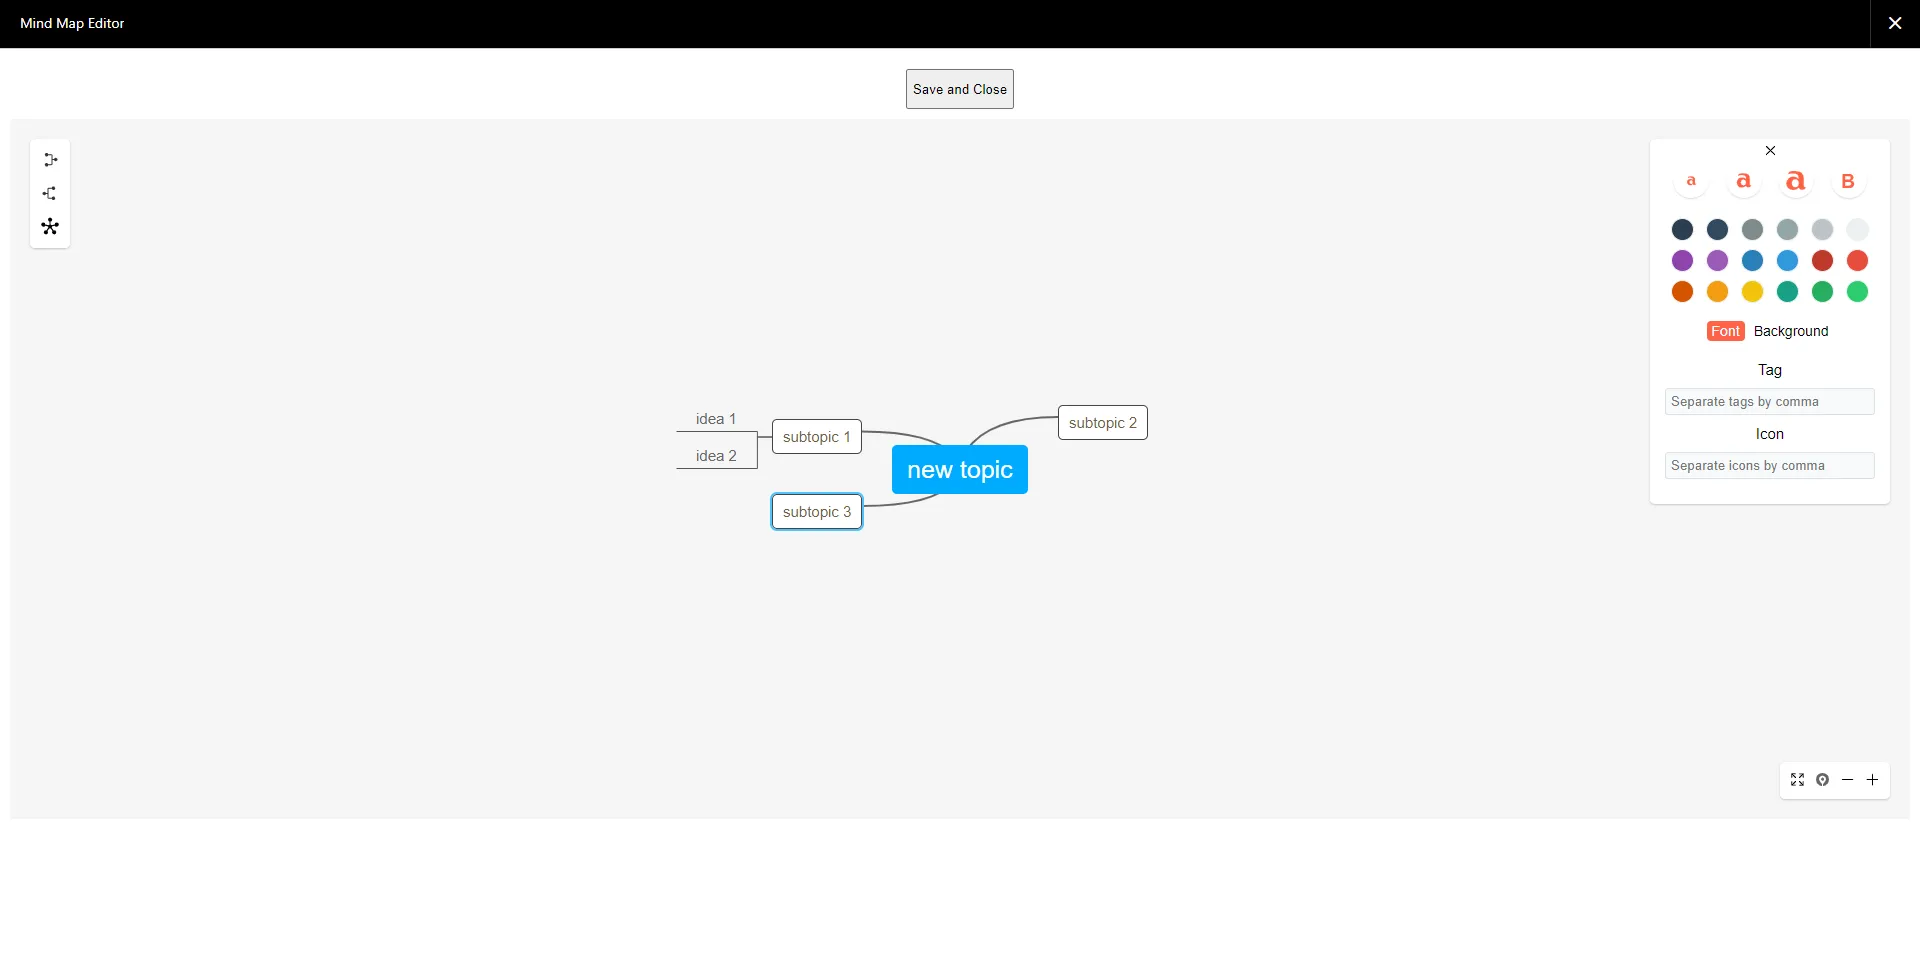
Click Save and Close, and wait until the drawing shows up in the dialog. If you don’t want to save the changes, click the X button on the top right corner.
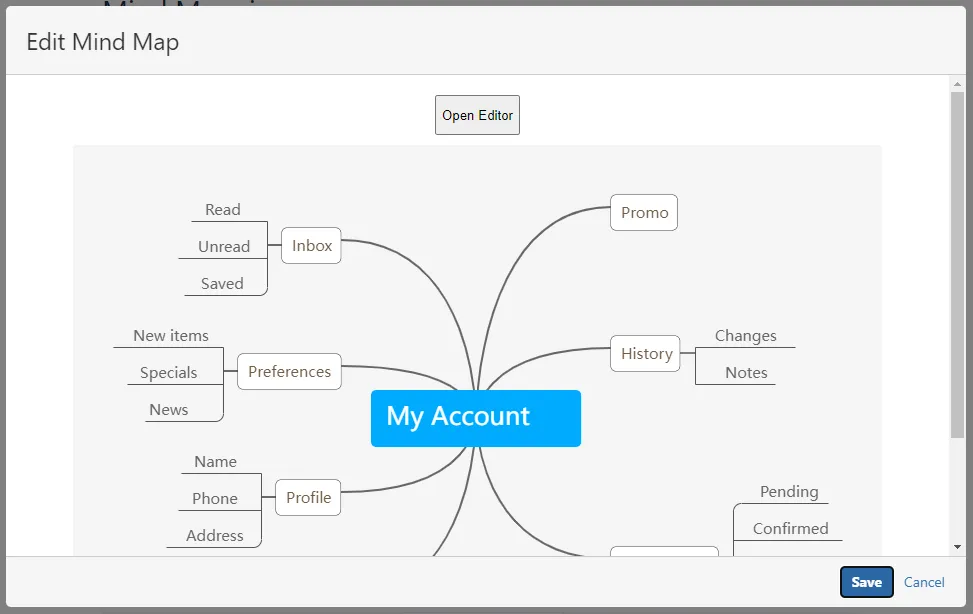
Click Insert (for new macro contents) or Save (for existing macro content).
Examples
Section titled “Examples”Mermaid
Section titled “Mermaid”Flowchart
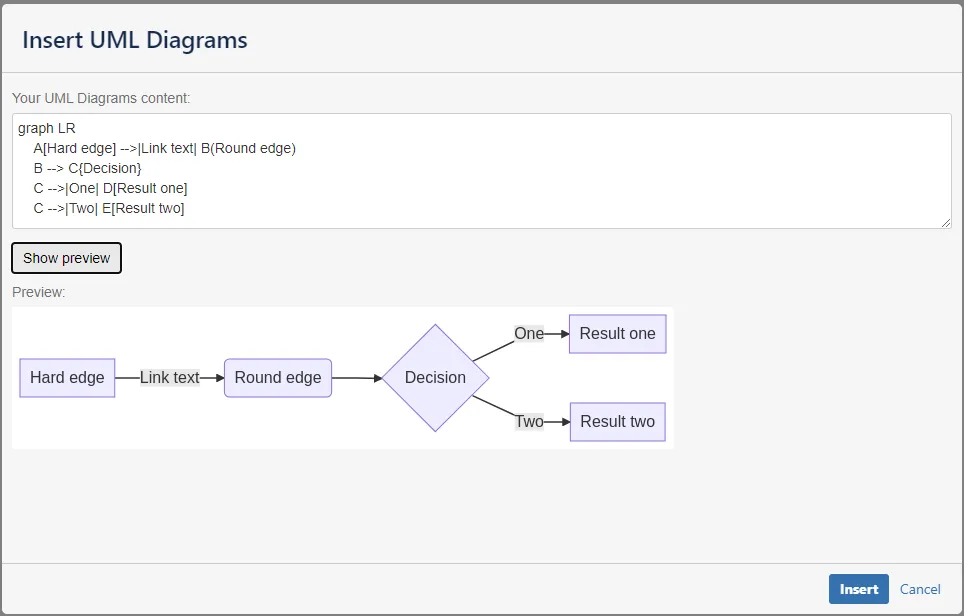
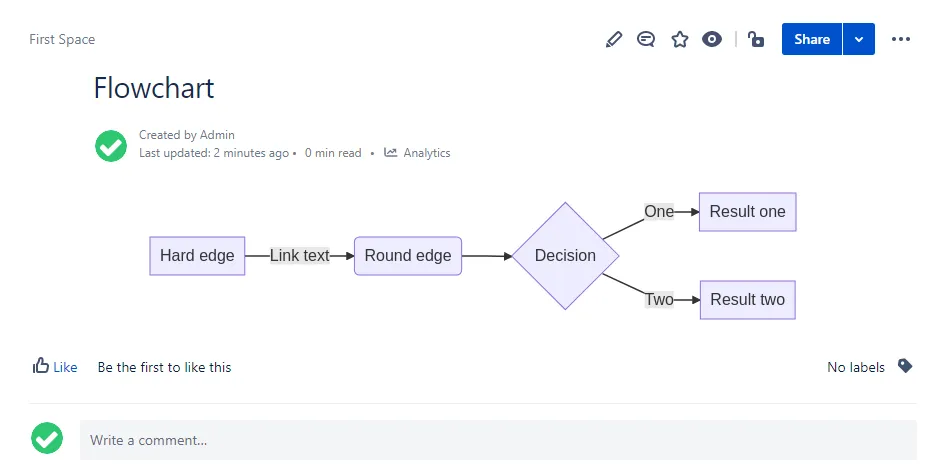
Section titled “Flowchart”Mermaid flowchart syntax includes options and examples.
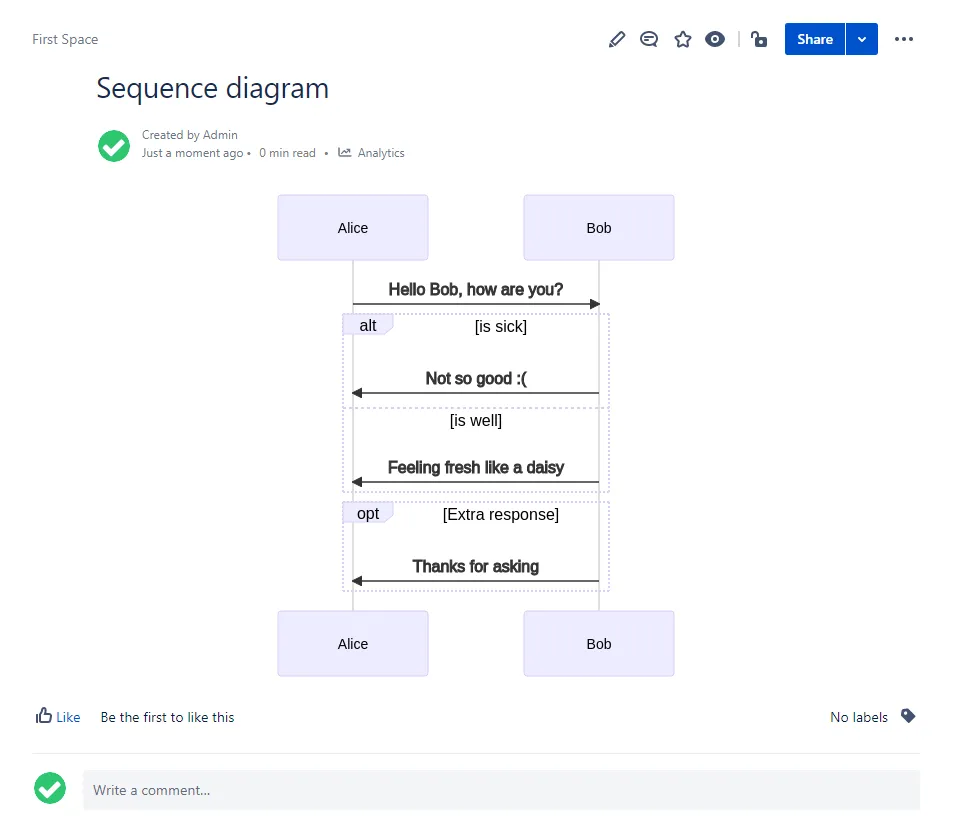
Sequence diagram
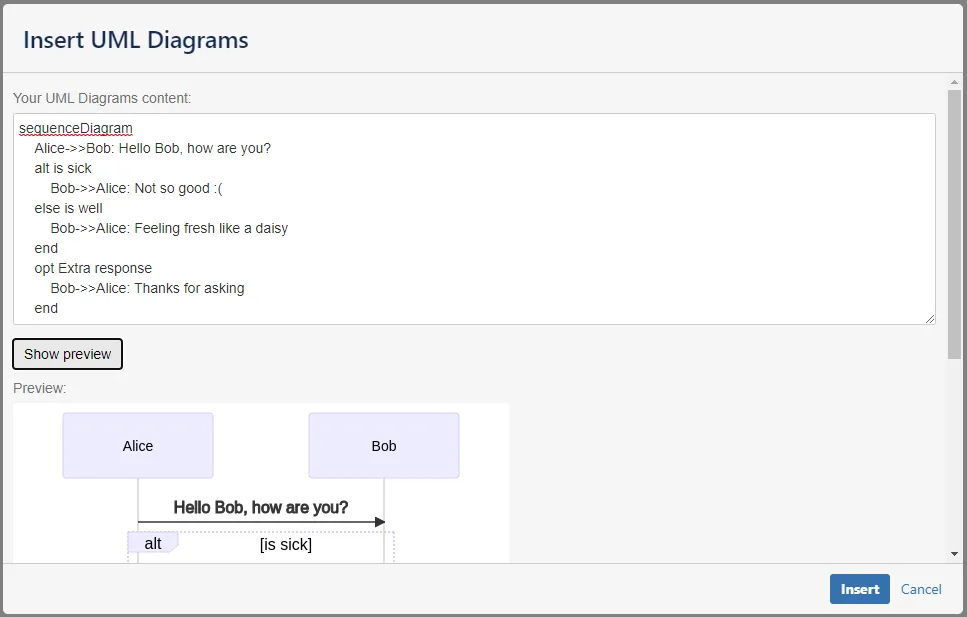
Section titled “Sequence diagram”Mermaid sequence diagram syntax includes options and examples.
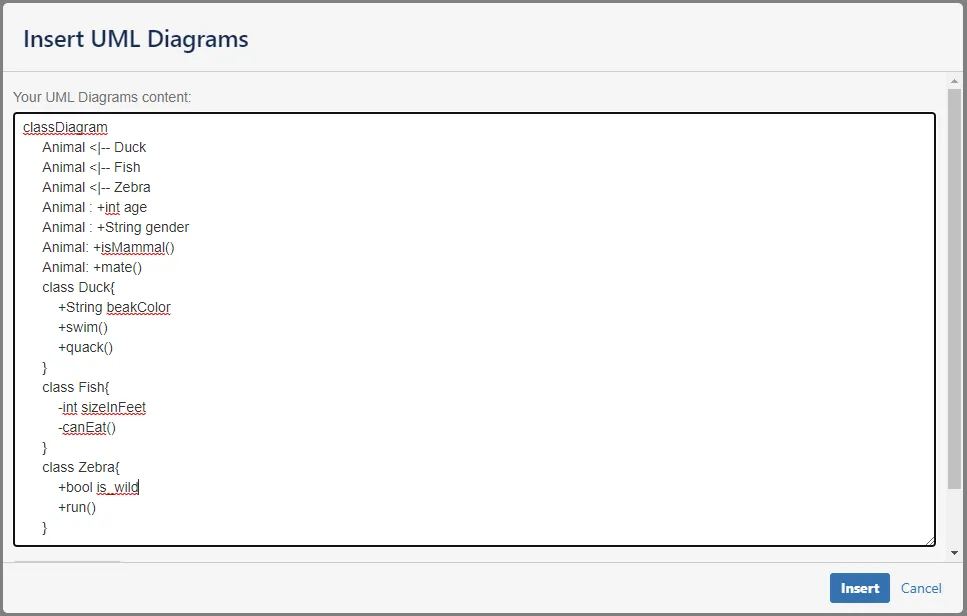
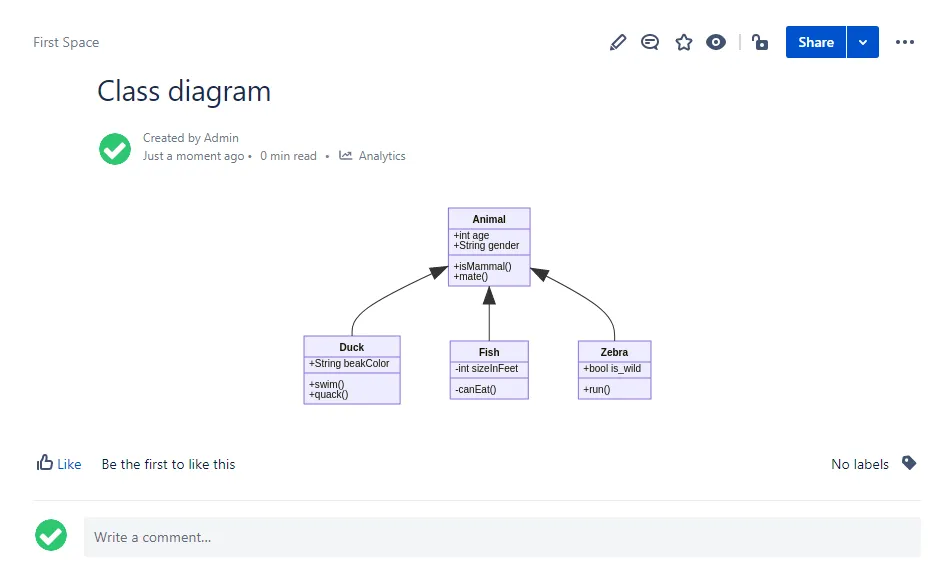
Class diagram
Section titled “Class diagram”Mermaid class diagram syntax includes options and examples.
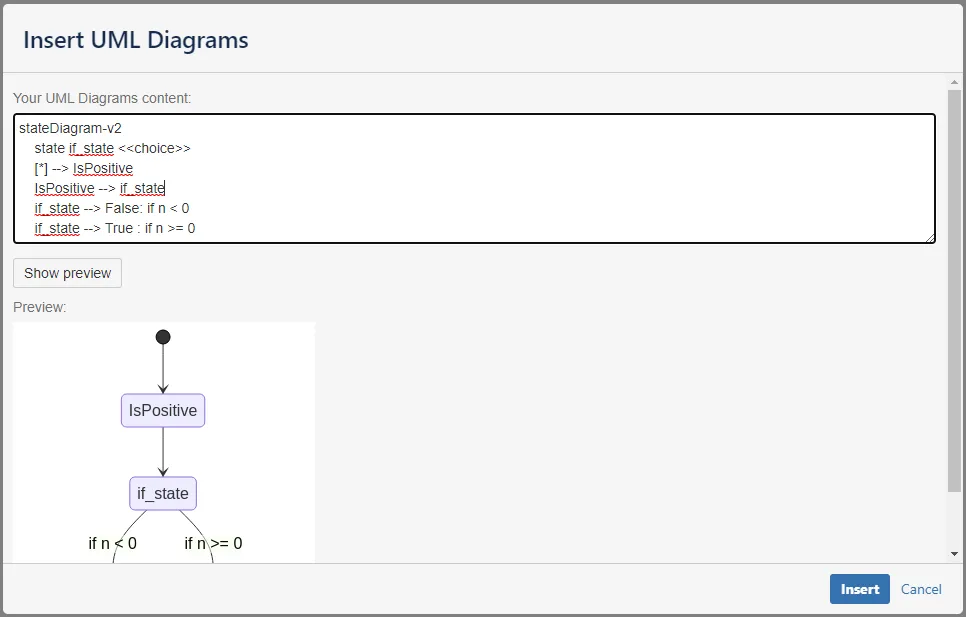
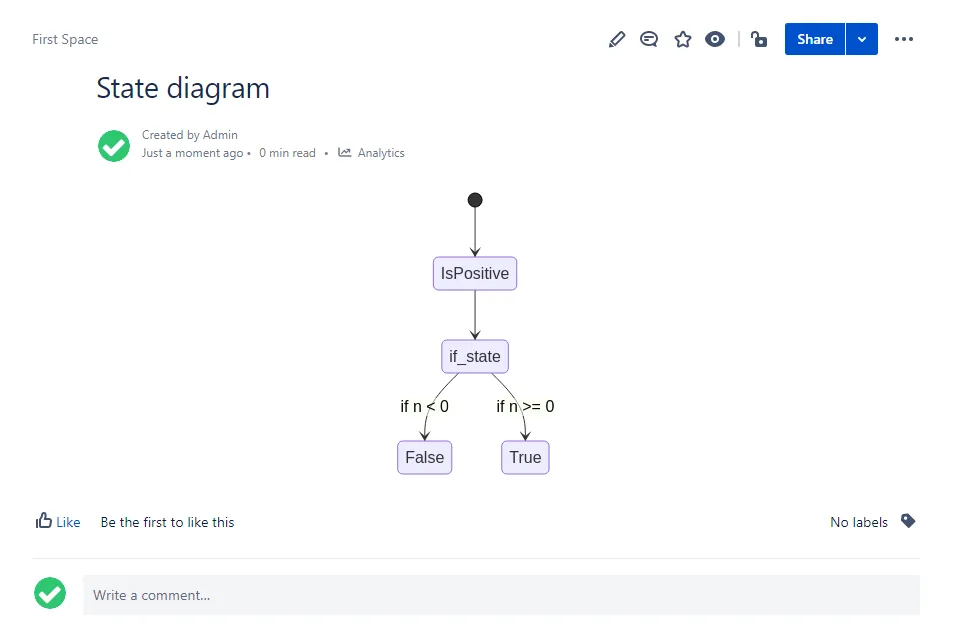
State diagram
Section titled “State diagram”Mermaid state diagram syntax includes options and examples.
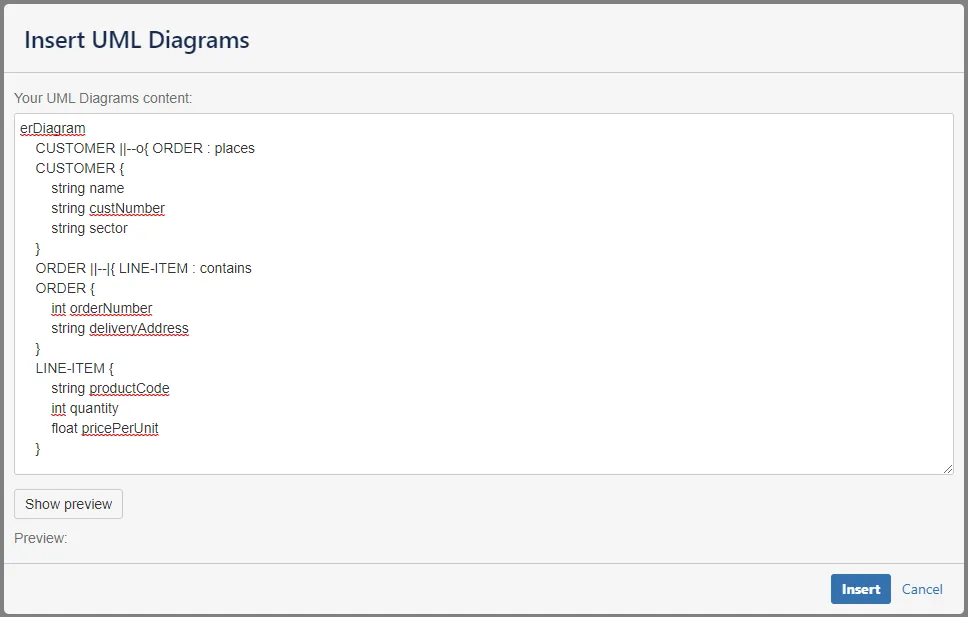
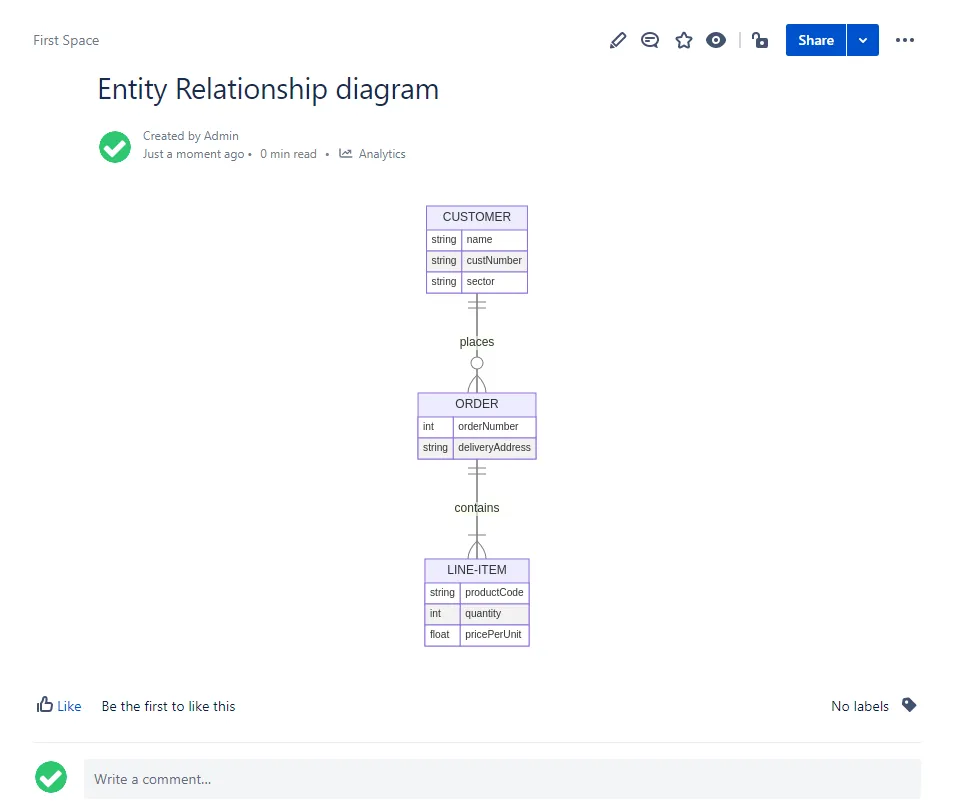
Entity Relationship diagram
Section titled “Entity Relationship diagram”Mermaid entity relationship diagram syntax includes options and examples.
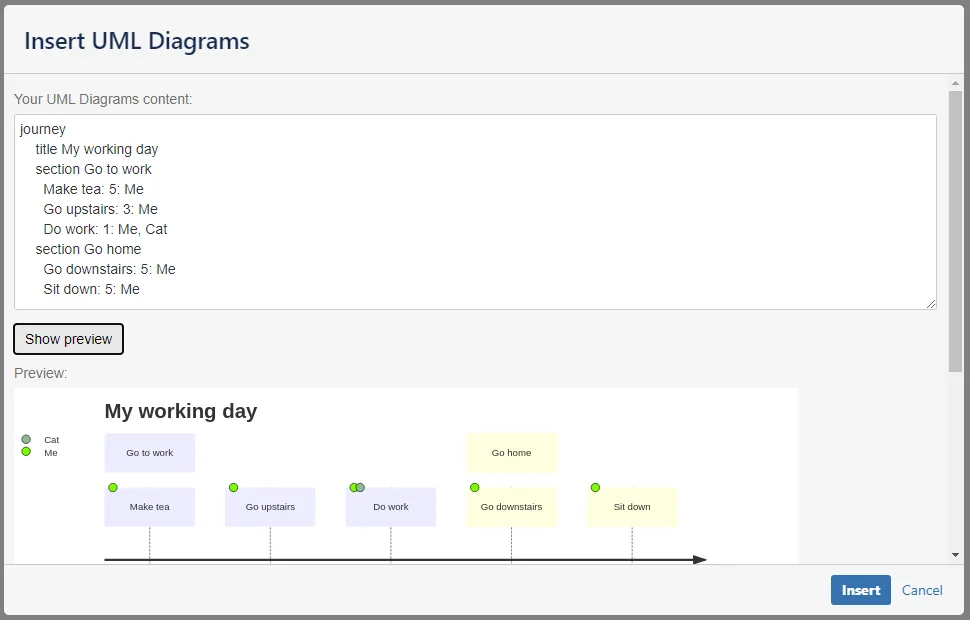
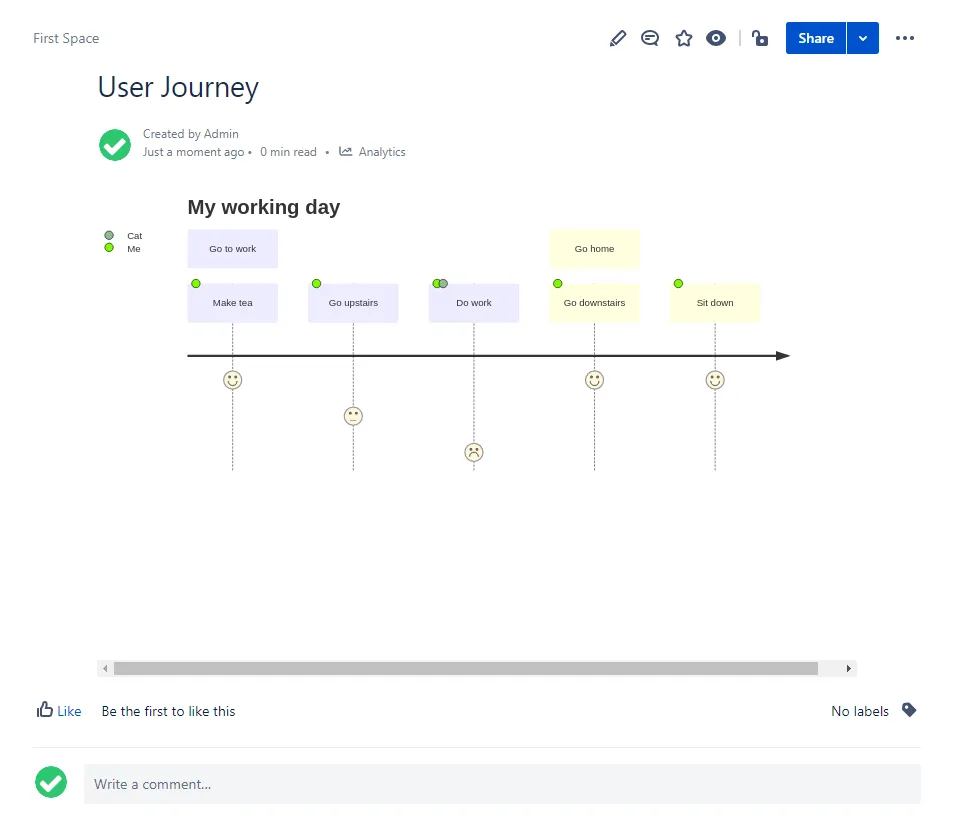
User Journey
Section titled “User Journey”Mermaid user journey syntax includes options and examples.
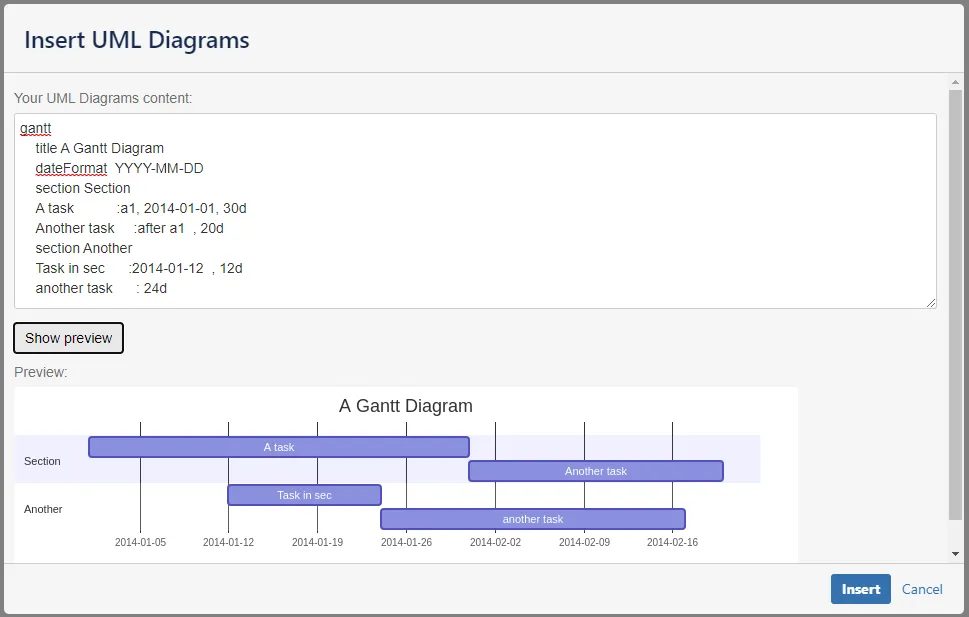
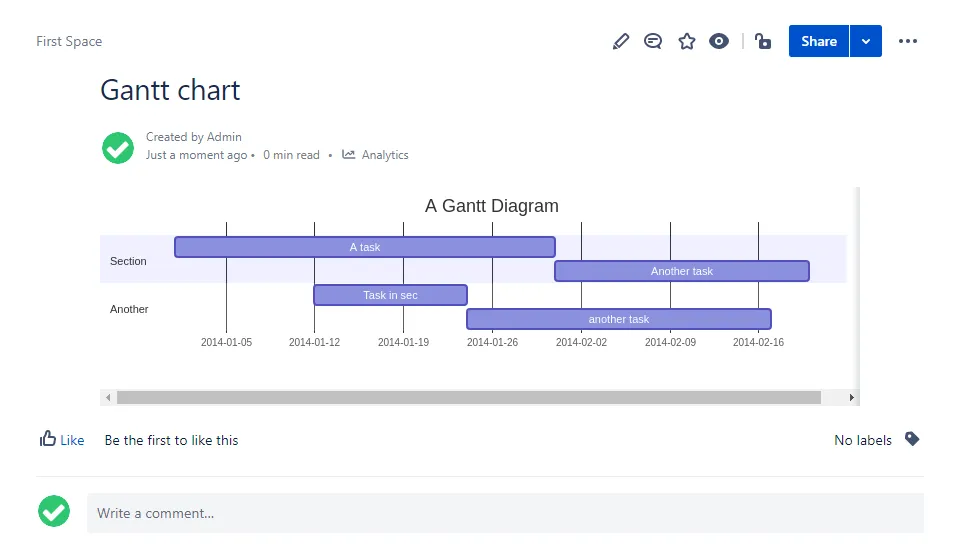
Gantt chart
Section titled “Gantt chart”Mermaid Gantt syntax includes options and examples.
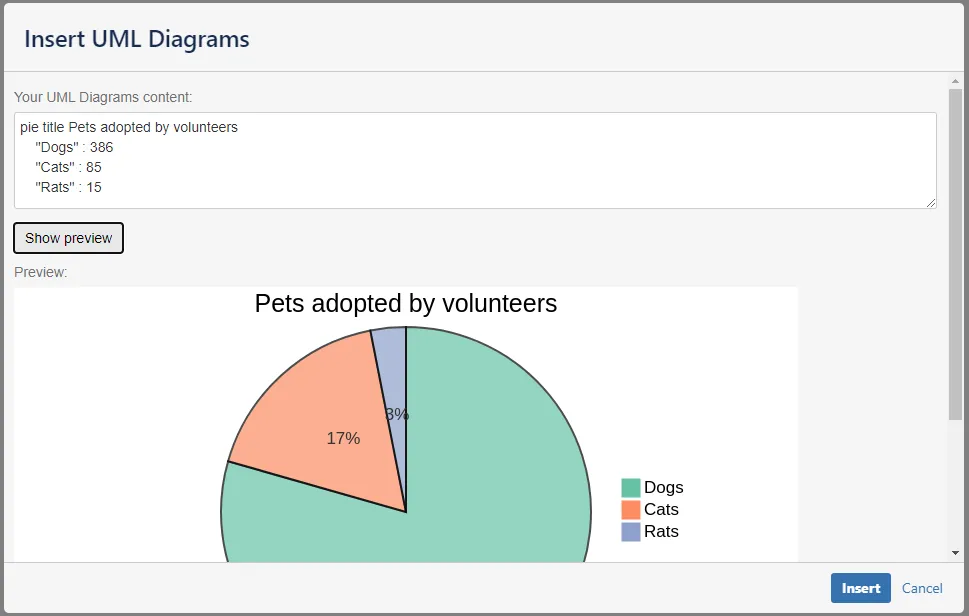
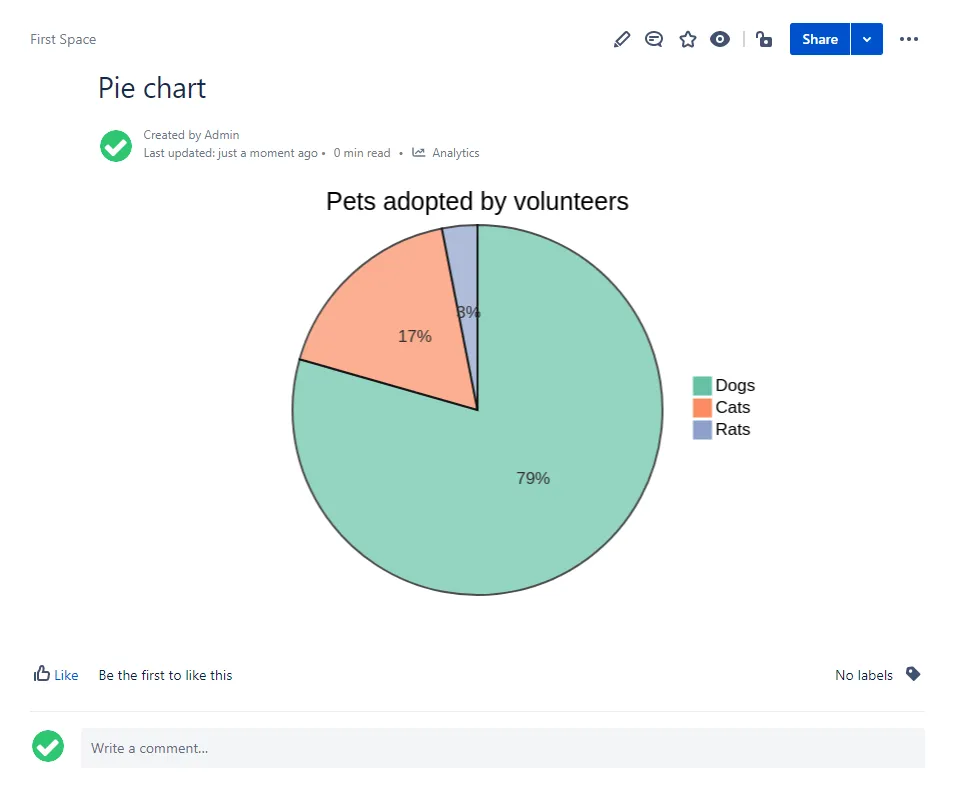
Pie chart
Section titled “Pie chart”Mermaid pie chart syntax includes options and examples.
Graphviz
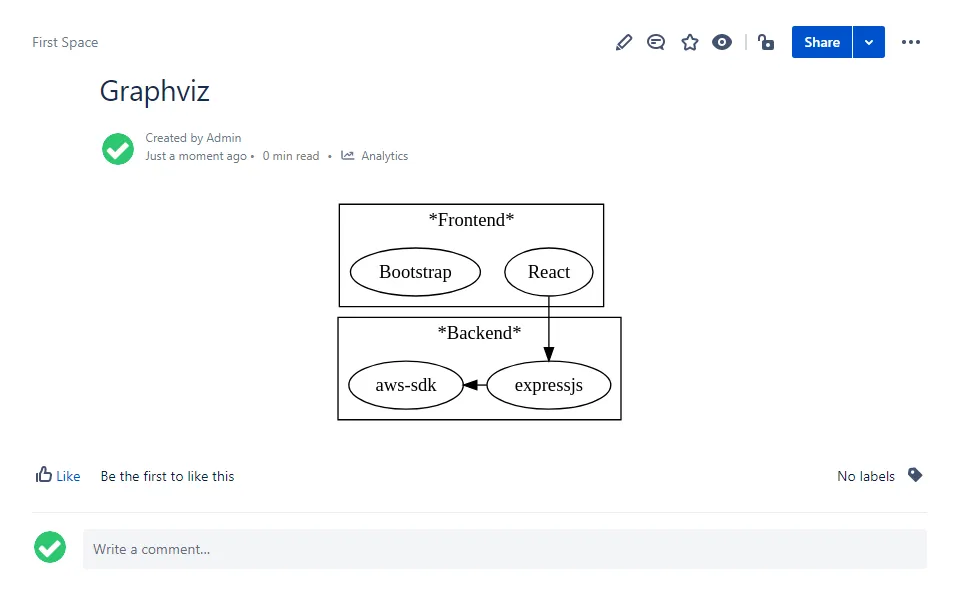
Section titled “Graphviz”This diagram is rendered with Graphviz.
PlantUML
Section titled “PlantUML”Sequence diagram
Section titled “Sequence diagram”@startumlAlice -> Bob: Authentication RequestBob --> Alice: Authentication ResponseAlice -> Bob: Another authentication RequestAlice <-- Bob: Another authentication Response@enduml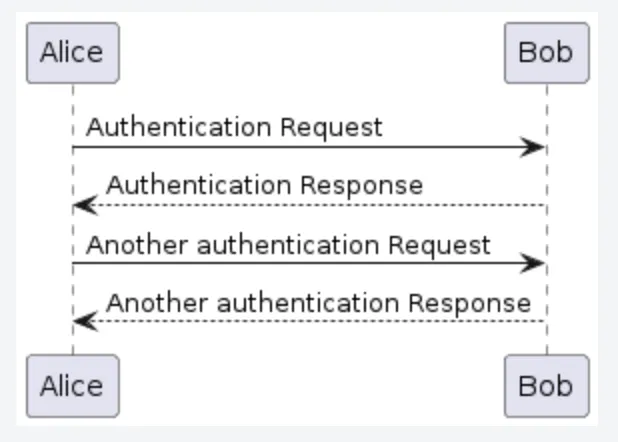
Use Case diagram
Section titled “Use Case diagram”@startumlleft to right directionactor Guest as gpackage Professional { actor Chef as c actor "Food Critic" as fc}package Restaurant { usecase "Eat Food" as UC1 usecase "Pay for Food" as UC2 usecase "Drink" as UC3 usecase "Review" as UC4}fc --> UC4g --> UC1g --> UC2g --> UC3@enduml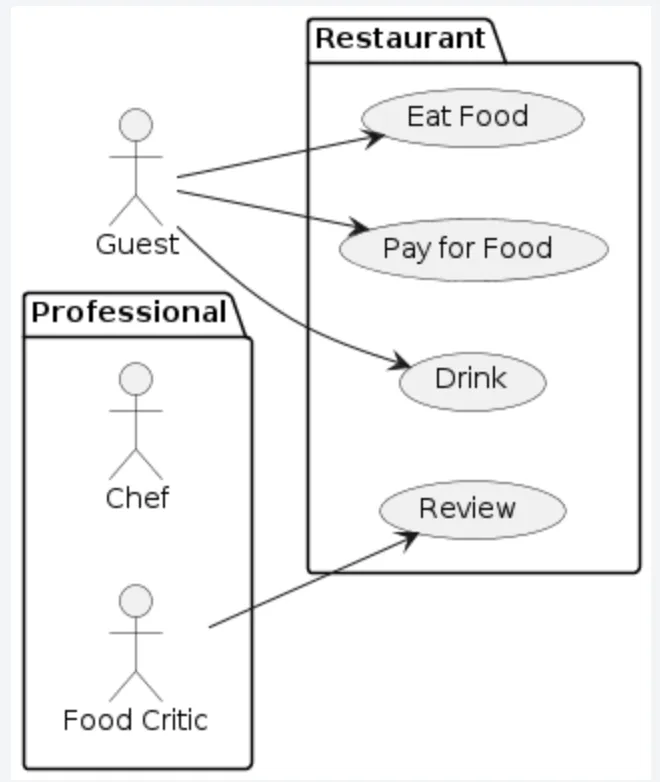
Class diagram
Section titled “Class diagram”@startumlObject <|-- ArrayListObject : equals()ArrayList : Object[] elementDataArrayList : size()@enduml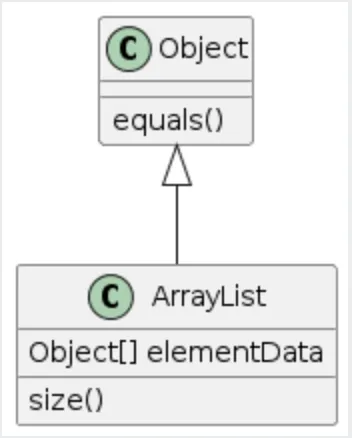
Activity diagram
Section titled “Activity diagram”@startumlstartrepeat :read data; :generate diagrams;repeat while (more data?) is (yes)->no;stop@enduml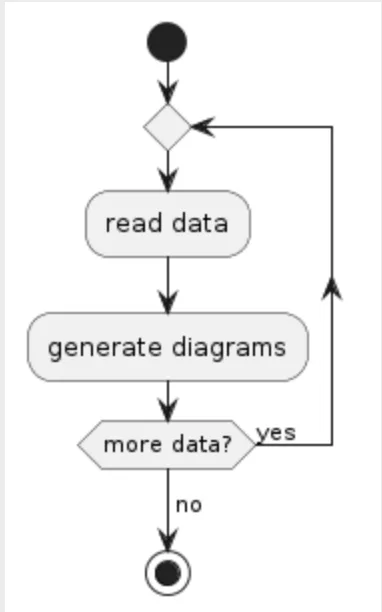
Component diagram
Section titled “Component diagram”@startumlpackage "Some Group" { HTTP - [First Component] [Another Component]}node "Other Groups" { FTP - [Second Component] [First Component] --> FTP}cloud { [Example 1]}database "MySql" { folder "This is my folder" { [Folder 3] } frame "Foo" { [Frame 4] }}[Another Component] --> [Example 1][Example 1] --> [Folder 3][Folder 3] --> [Frame 4]@enduml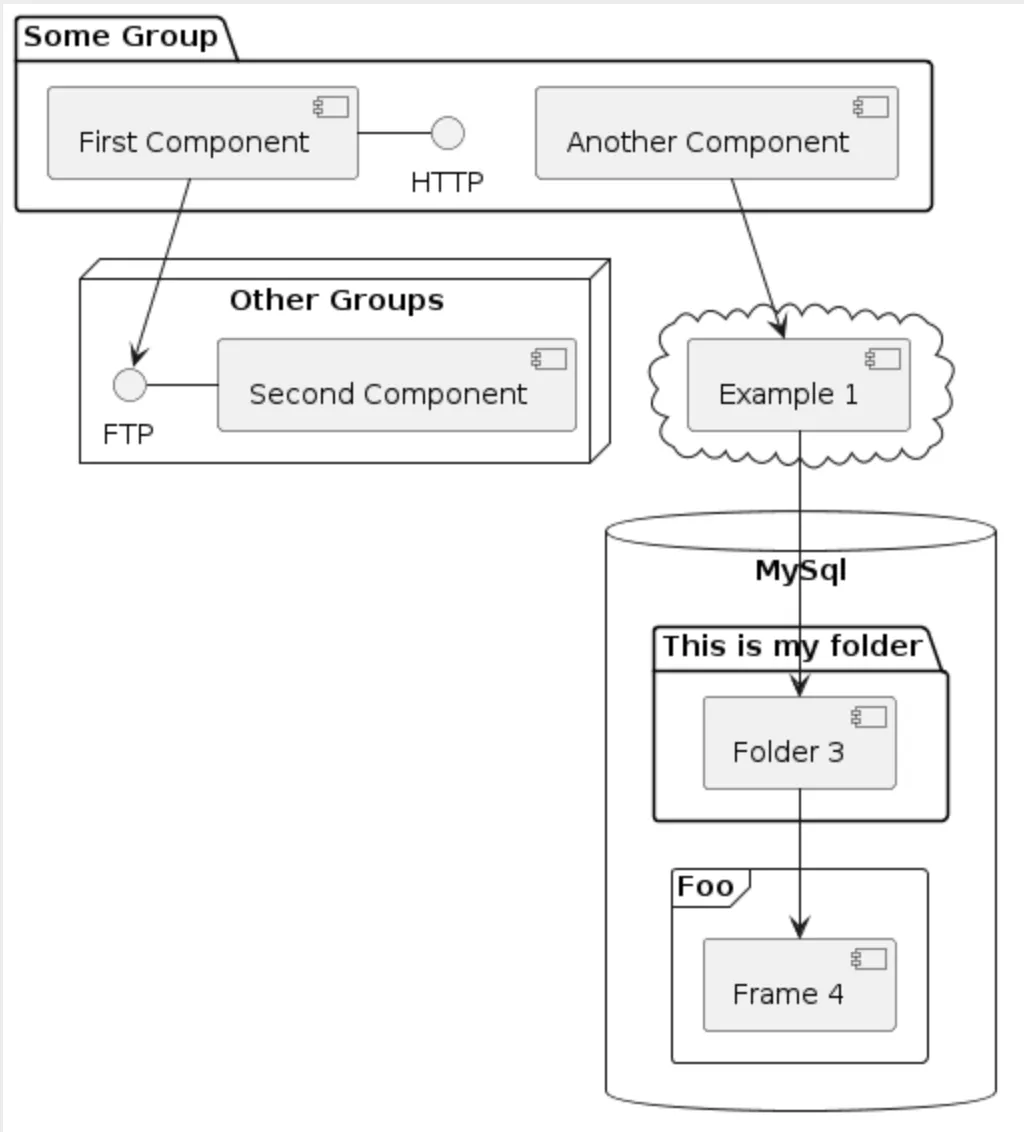
Deployment diagram
Section titled “Deployment diagram”@startumlnode node1node node2node node3node node4node node5node1 -- node2 : label1node1 .. node3 : label2node1 ~~ node4 : label3node1 == node5@enduml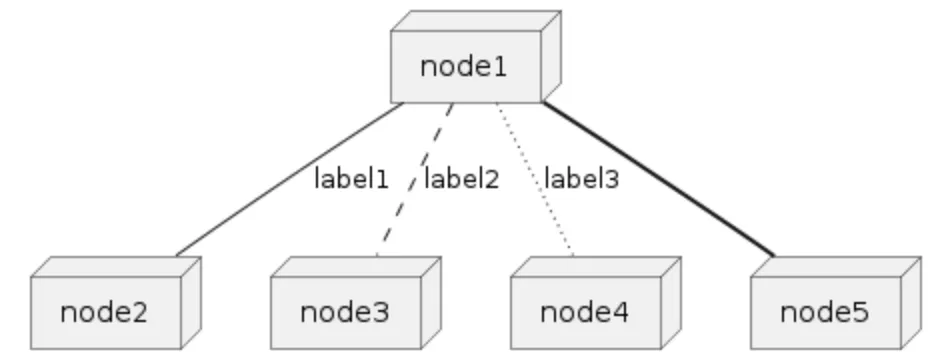
State diagram
Section titled “State diagram”@startumlscale 350 width[*] --> NotShootingstate NotShooting { [*] --> Idle Idle --> Configuring : EvConfig Configuring --> Idle : EvConfig}state Configuring { [*] --> NewValueSelection NewValueSelection --> NewValuePreview : EvNewValue NewValuePreview --> NewValueSelection : EvNewValueRejected NewValuePreview --> NewValueSelection : EvNewValueSaved state NewValuePreview { State1 -> State2 }}@enduml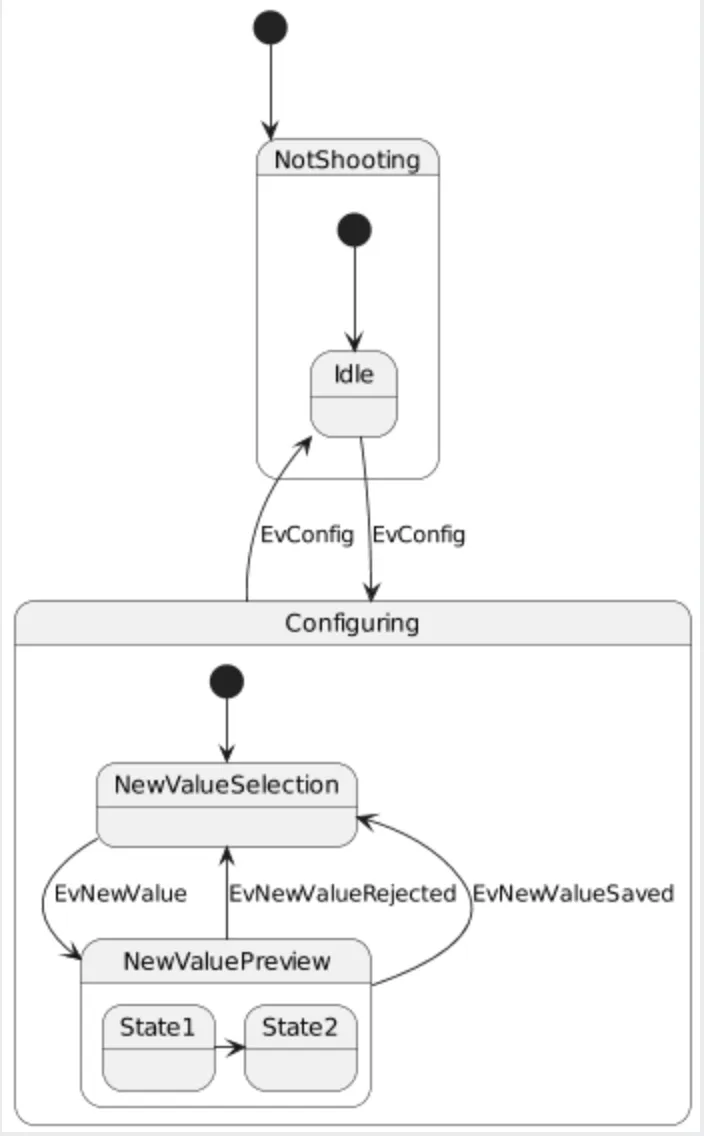
Timing diagram
Section titled “Timing diagram”@startumlrobust "Web Browser" as WBconcise "Web User" as WU@0WU is IdleWB is Idle@100WU is WaitingWB is Processing@300WB is Waiting@enduml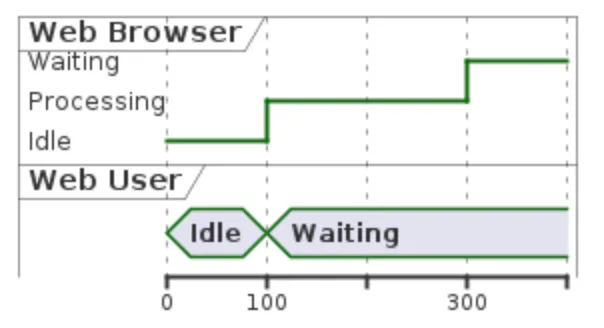
@startjson{ "firstName": "John", "lastName": "Smith", "isAlive": true, "age": 27, "address": { "streetAddress": "21 2nd Street", "city": "New York", "state": "NY", "postalCode": "10021-3100" }, "phoneNumbers": [ { "type": "home", "number": "212 555-1234" }, { "type": "office", "number": "646 555-4567" } ], "children": [], "spouse": null}@endjson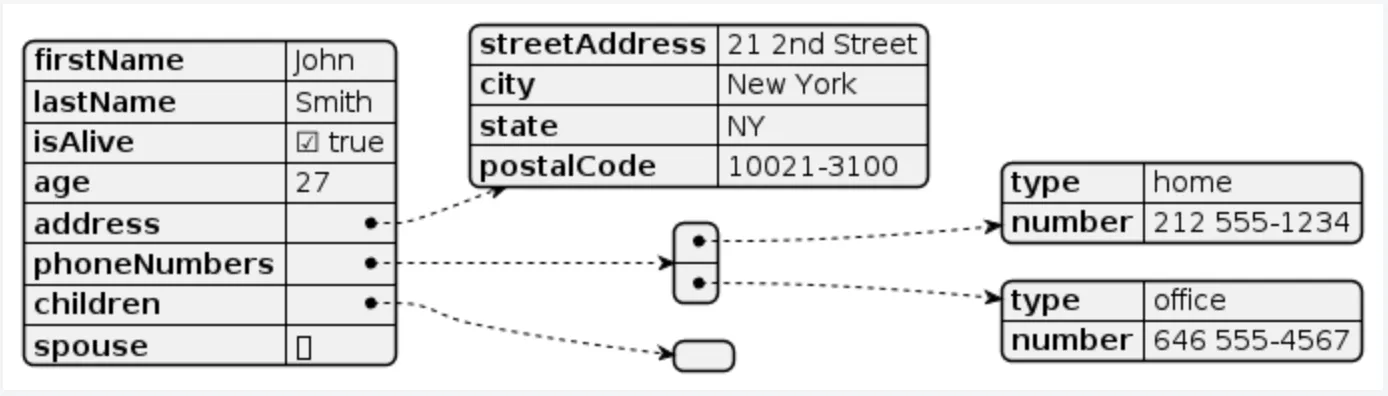
Mind Map
Section titled “Mind Map”@startmindmap* Class Templates**:Example 1<code>template <typename T>class cname{void f1()<U+003B>...}</code>;**:Example 2<code>other template <typename T>class cname{...</code>;@endmindmap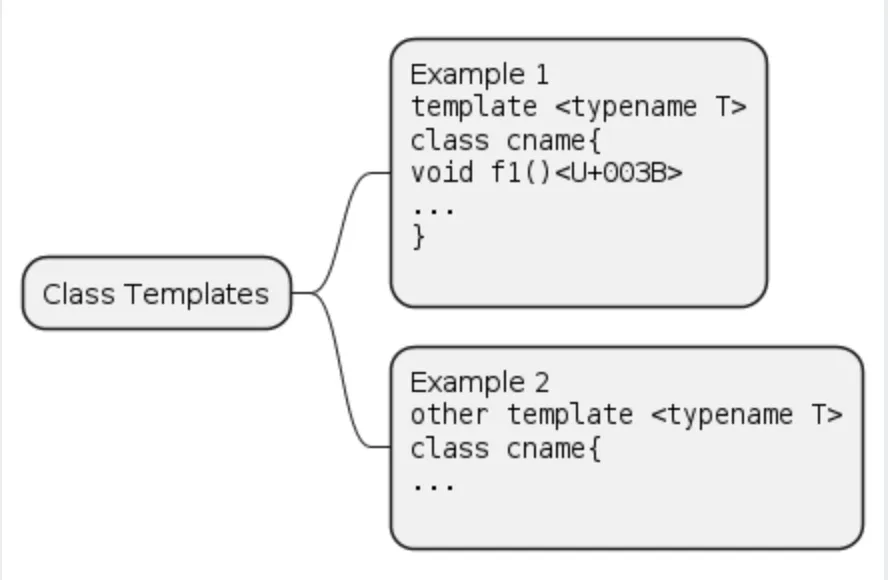
Work Breakdown Structure
Section titled “Work Breakdown Structure”@startwbs* Business Process Modelling WBS** Launch the project*** Complete Stakeholder Research*** Initial Implementation Plan** Design phase*** Model of AsIs Processes Completed**** Model of AsIs Processes Completed1**** Model of AsIs Processes Completed2*** Measure AsIs performance metrics*** Identify Quick Wins** Complete innovate phase@endwbs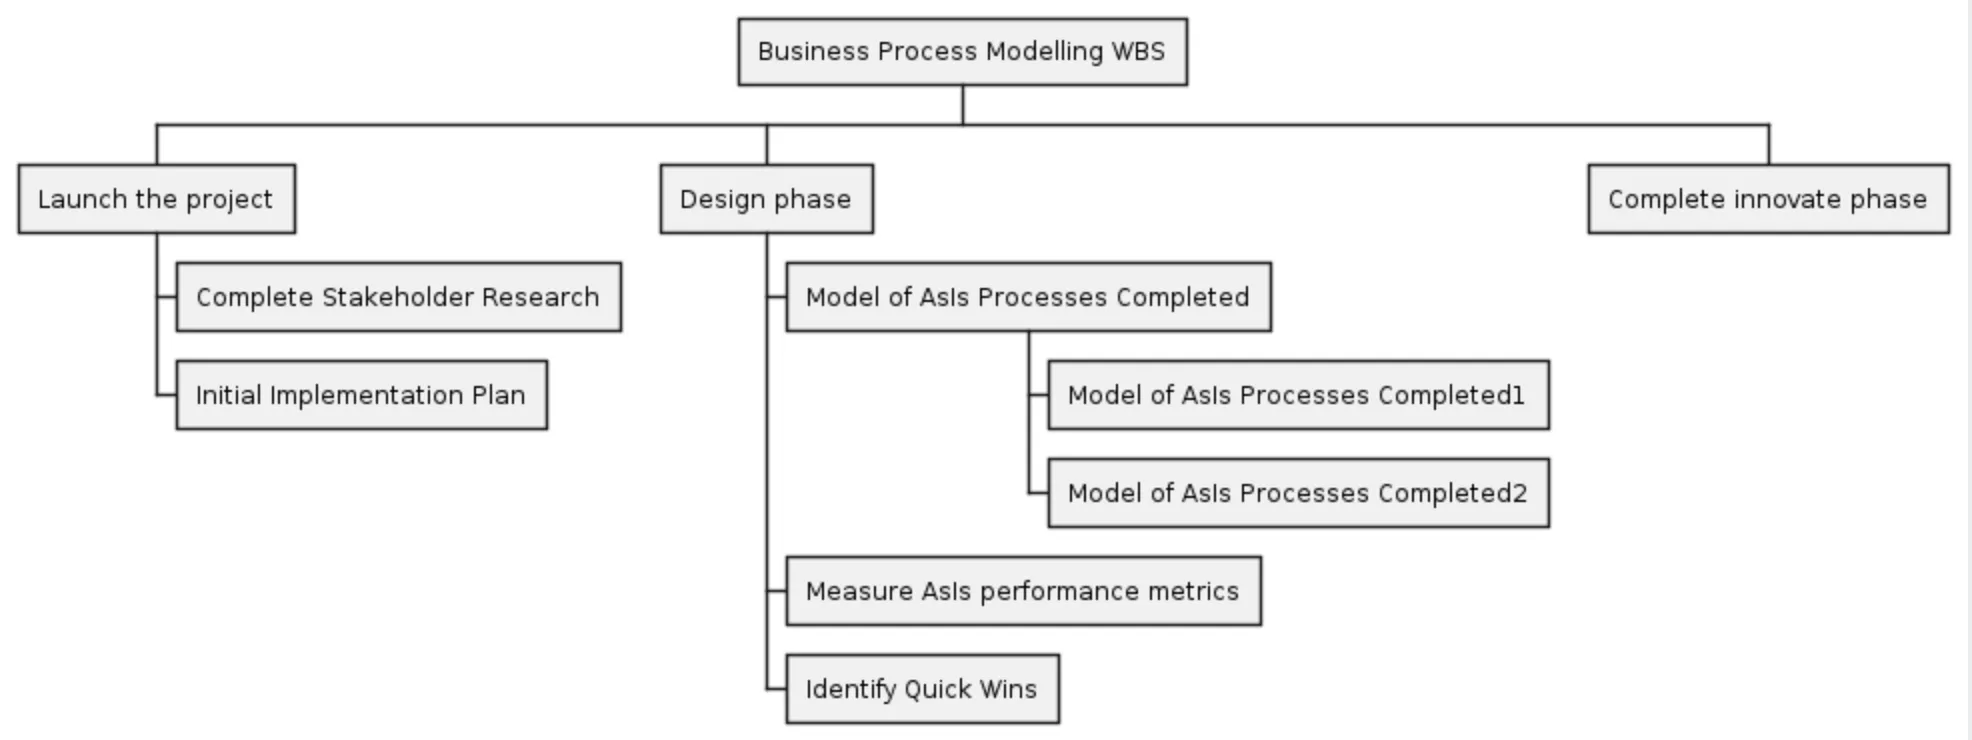
@startuml:<math>int_0^1f(x)dx</math>;:<math>x^2+y_1+z_12^34</math>;note rightTry also<math>d/dxf(x)=lim_(h->0)(f(x+h)-f(x))/h</math><latex>P(y|\mathbf{x}) \mbox{ or } f(\mathbf{x})+\epsilon</latex>end note@enduml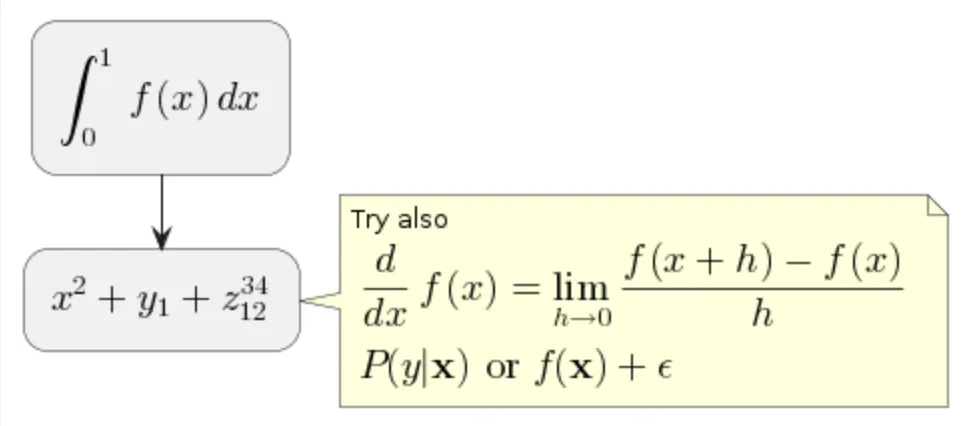
Entity Relationship diagram
Section titled “Entity Relationship diagram”@startuml' hide the spothide circle' avoid problems with angled crows feetskinparam linetype orthoentity "Entity01" as e01 { *e1_id : number <<generated>> -- *name : text description : text}entity "Entity02" as e02 { *e2_id : number <<generated>> -- *e1_id : number <<FK>> other_details : text}entity "Entity03" as e03 { *e3_id : number <<generated>> -- e1_id : number <<FK>> other_details : text}e01 ||..o{ e02e01 |o..o{ e03@enduml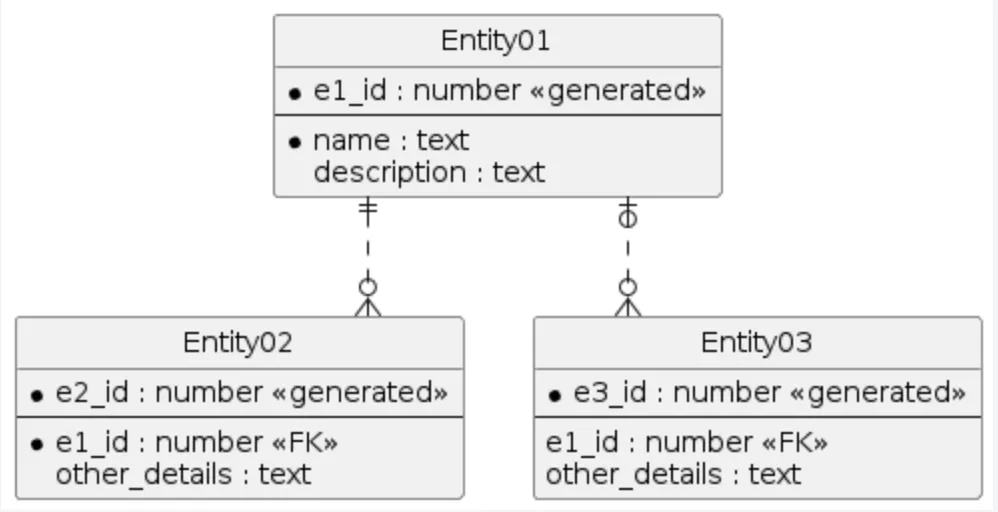
C4 diagram
Section titled “C4 diagram”@startuml!include https://raw.githubusercontent.com/plantuml-stdlib/C4-PlantUML/master/C4_Container.puml' uncomment the following line and comment the first to use locally' !include C4_Container.puml
' LAYOUT_TOP_DOWN()' LAYOUT_AS_SKETCH()LAYOUT_WITH_LEGEND()
title Container diagram for Internet Banking System
Person(customer, Customer, "A customer of the bank, with personal bank accounts")
System_Boundary(c1, "Internet Banking") { Container(web_app, "Web Application", "Java, Spring MVC", "Delivers the static content and the Internet banking SPA") Container(spa, "Single-Page App", "JavaScript, Angular", "Provides all the Internet banking functionality to cutomers via their web browser") Container(mobile_app, "Mobile App", "C#, Xamarin", "Provides a limited subset of the Internet banking functionality to customers via their mobile device") ContainerDb(database, "Database", "SQL Database", "Stores user registration information, hashed auth credentials, access logs, etc.") Container(backend_api, "API Application", "Java, Docker Container", "Provides Internet banking functionality via API")}
System_Ext(email_system, "E-Mail System", "The internal Microsoft Exchange system")System_Ext(banking_system, "Mainframe Banking System", "Stores all of the core banking information about customers, accounts, transactions, etc.")
Rel(customer, web_app, "Uses", "HTTPS")Rel(customer, spa, "Uses", "HTTPS")Rel(customer, mobile_app, "Uses")
Rel_Neighbor(web_app, spa, "Delivers")Rel(spa, backend_api, "Uses", "async, JSON/HTTPS")Rel(mobile_app, backend_api, "Uses", "async, JSON/HTTPS")Rel_Back_Neighbor(database, backend_api, "Reads from and writes to", "sync, JDBC")
Rel_Back(customer, email_system, "Sends e-mails to")Rel_Back(email_system, backend_api, "Sends e-mails using", "sync, SMTP")Rel_Neighbor(backend_api, banking_system, "Uses", "sync/async, XML/HTTPS")@endumlplan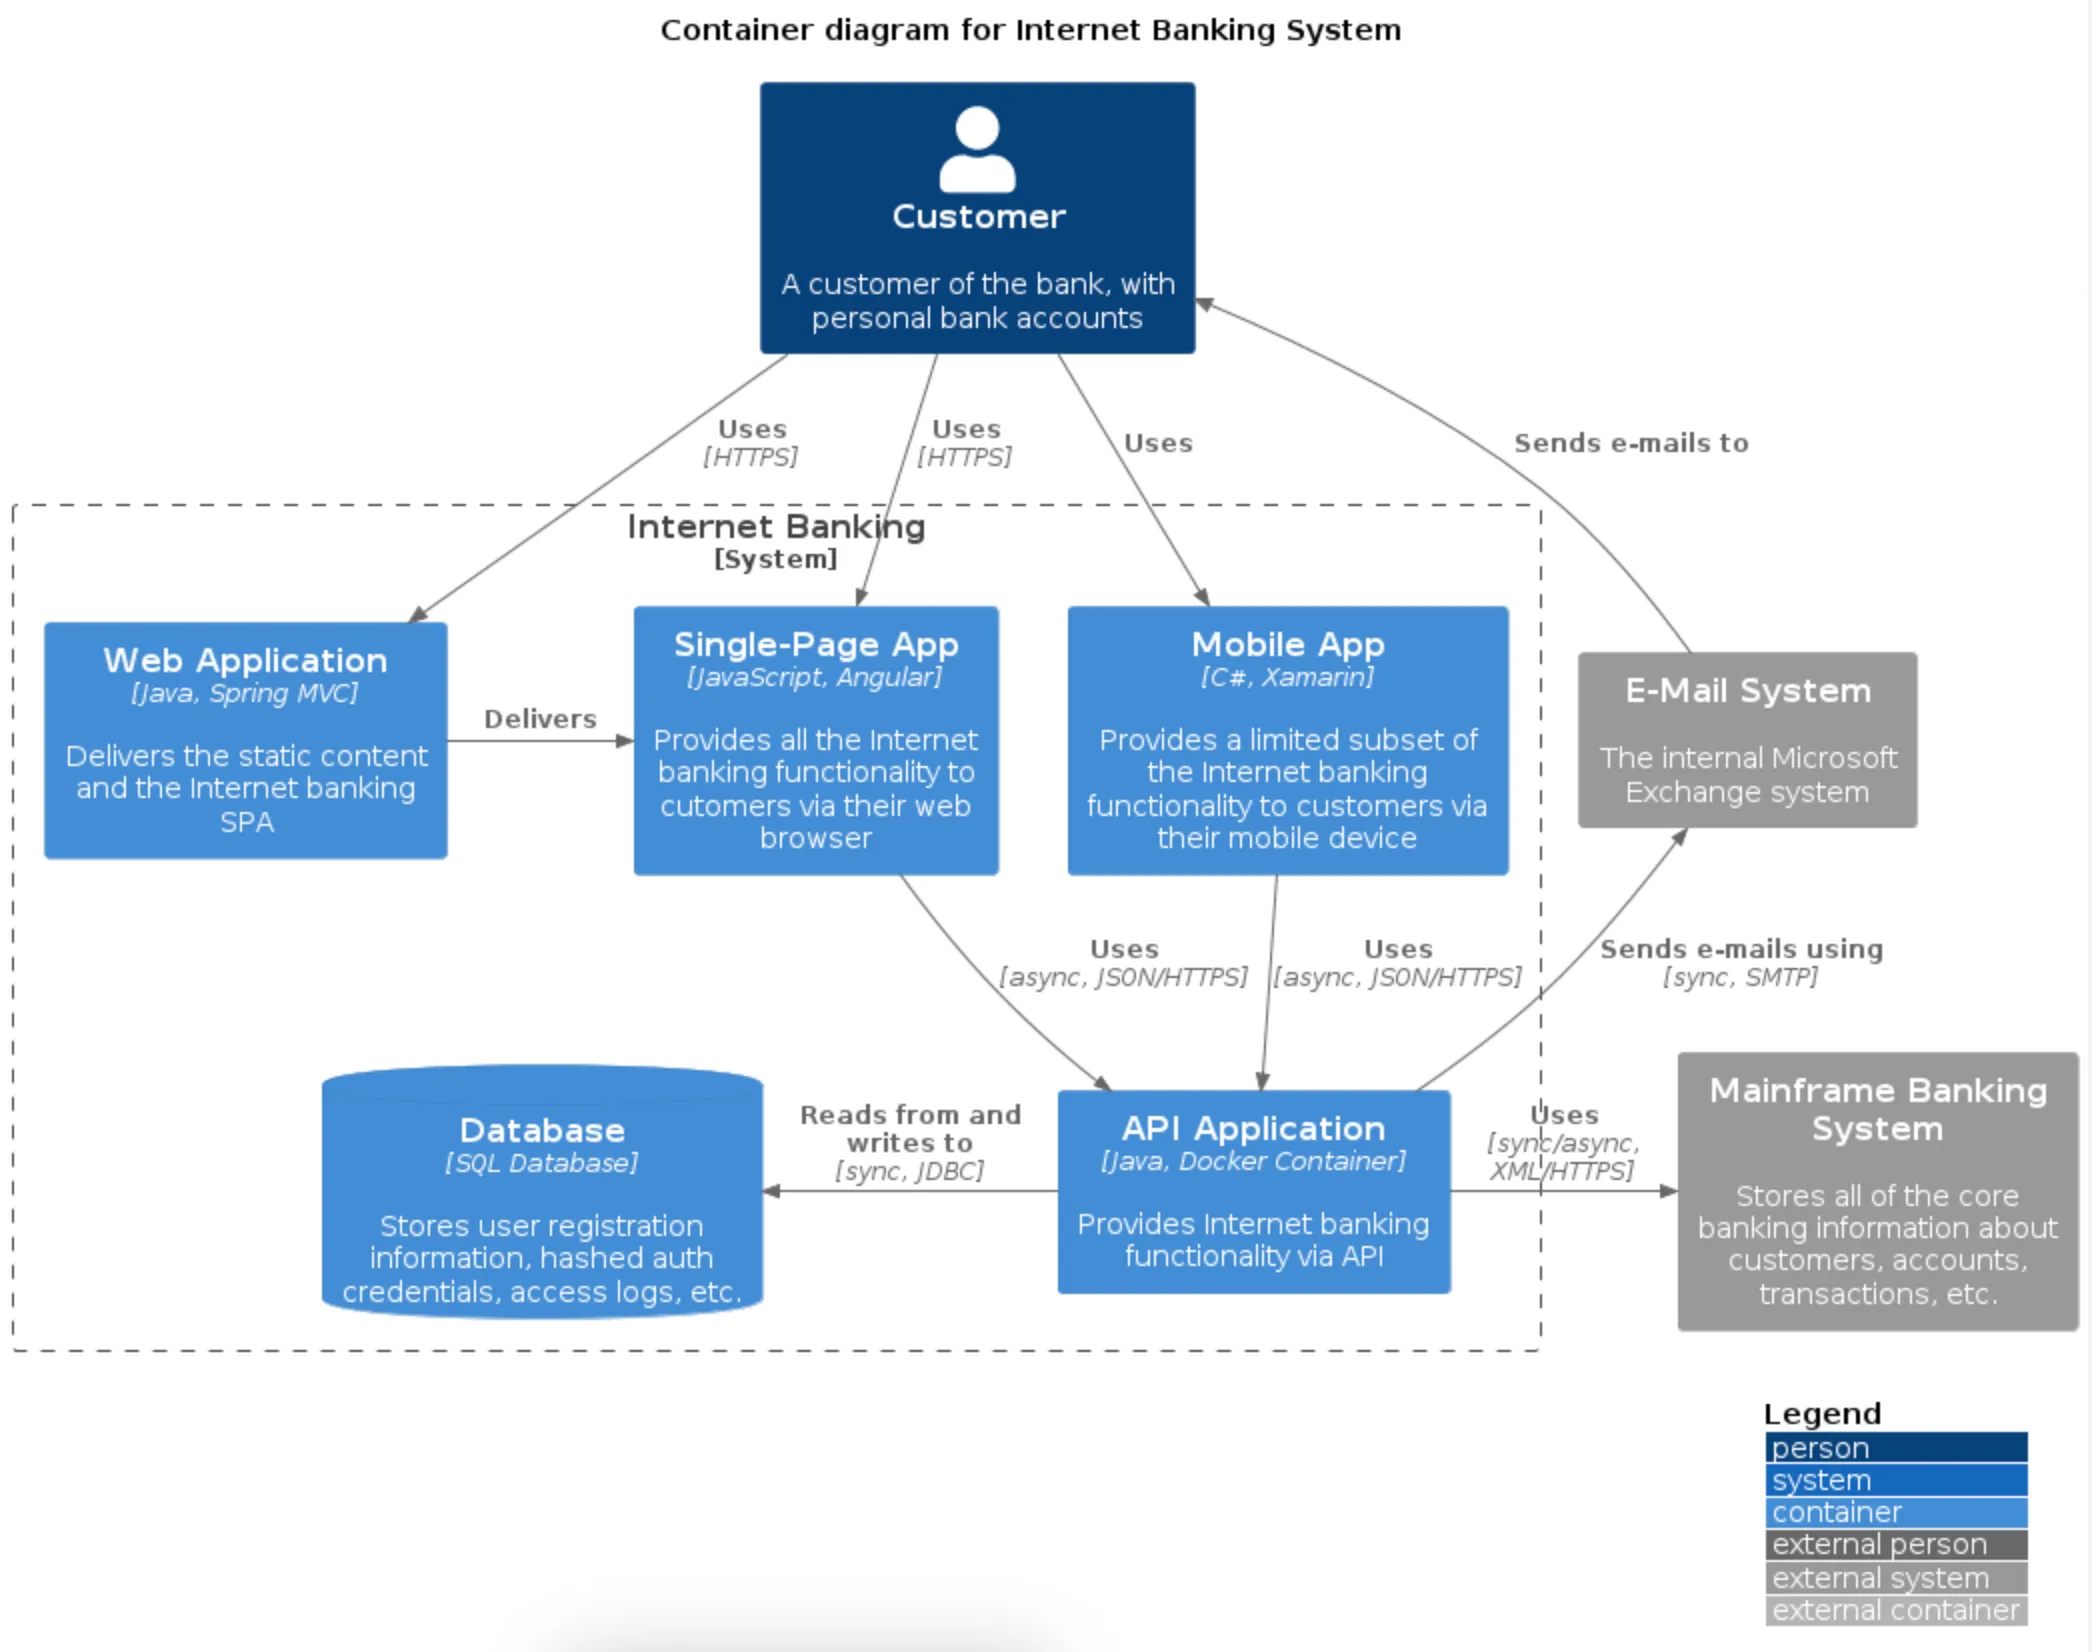
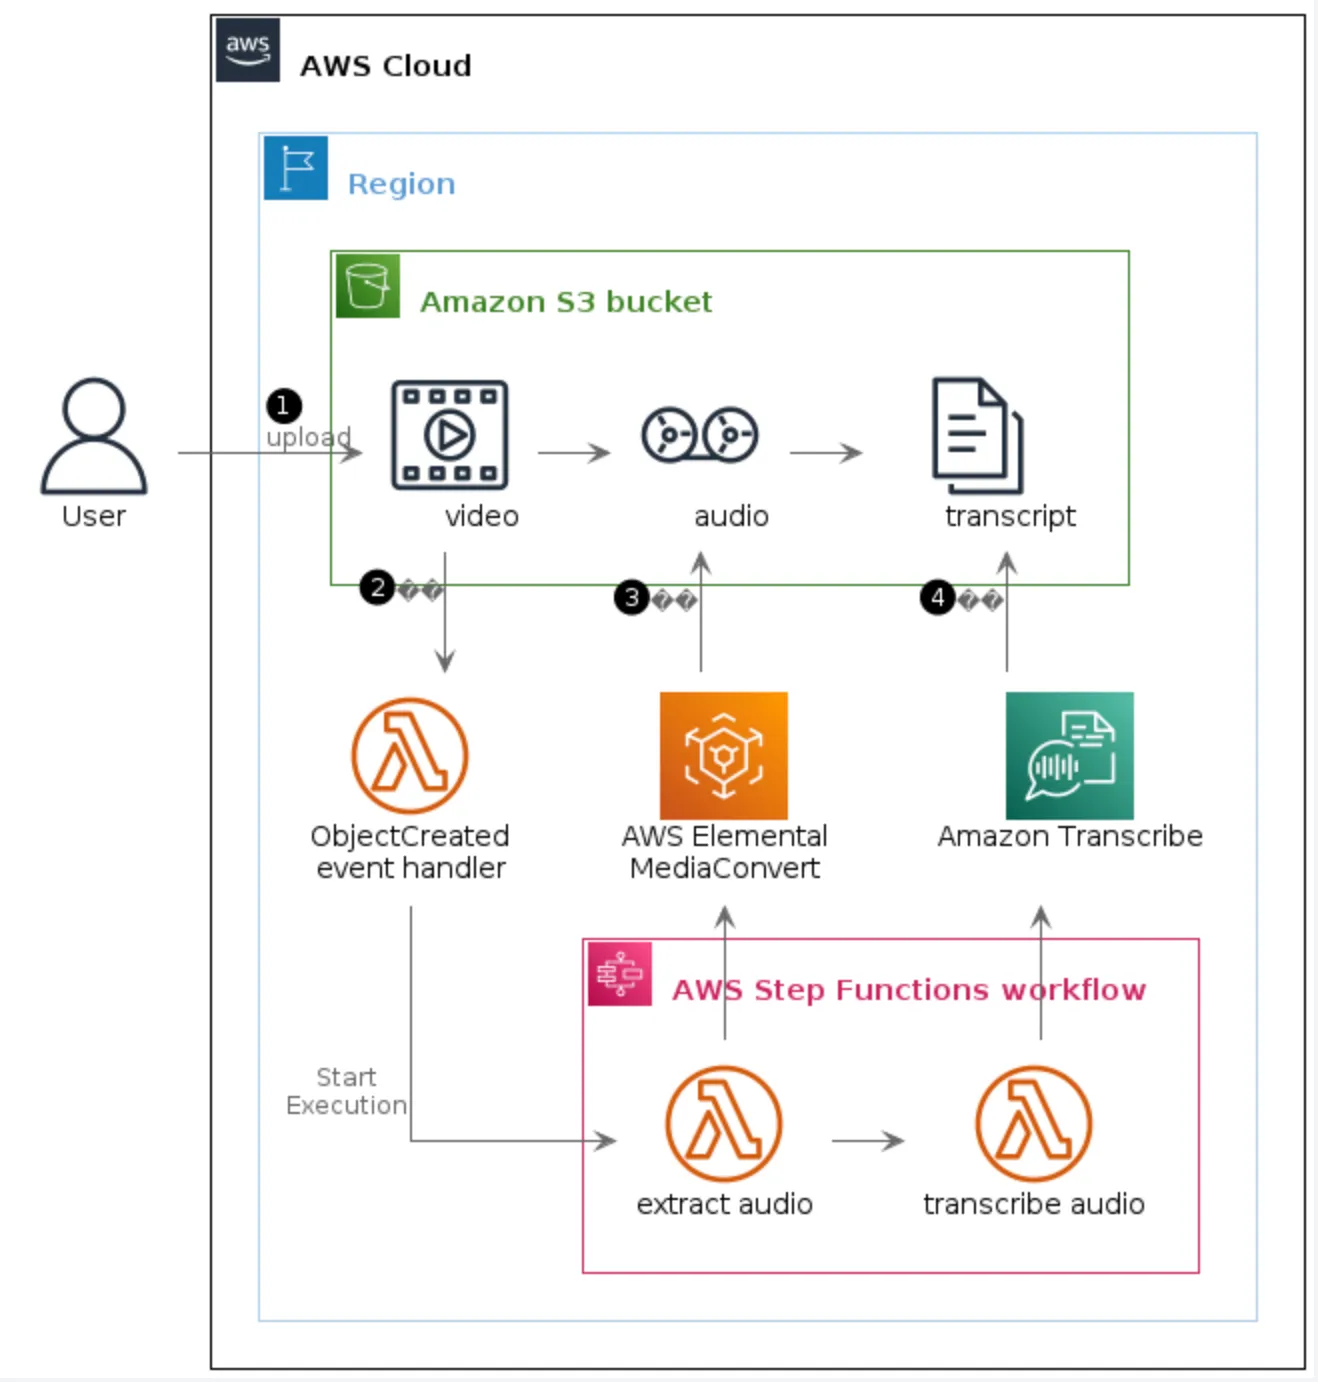
AWS architecture diagram
Section titled “AWS architecture diagram”@startuml S3 Upload Workflow'Copyright 2019 Amazon.com, Inc. or its affiliates. All Rights Reserved.'SPDX-License-Identifier: MIT (For details, see https://github.com/awslabs/aws-icons-for-plantuml/blob/master/LICENSE)
!define AWSPuml https://raw.githubusercontent.com/awslabs/aws-icons-for-plantuml/v15.0/dist!include AWSPuml/AWSCommon.puml!include AWSPuml/AWSExperimental.puml!include AWSPuml/Groups/all.puml!include AWSPuml/Compute/LambdaLambdaFunction.puml!include AWSPuml/General/Documents.puml!include AWSPuml/General/Multimedia.puml!include AWSPuml/General/Tapestorage.puml!include AWSPuml/General/User.puml!include AWSPuml/MediaServices/ElementalMediaConvert.puml!include AWSPuml/MachineLearning/Transcribe.puml!include AWSPuml/Storage/SimpleStorageService.puml
' define custom group for Amazon S3 bucketAWSGroupColoring(S3BucketGroup, #FFFFFF, AWS_COLOR_GREEN, plain)!define S3BucketGroup(g_alias, g_label="Amazon S3 bucket") AWSGroupEntity(g_alias, g_label, AWS_COLOR_GREEN, SimpleStorageService, S3BucketGroup)
' Groups are rectangles with a custom style using stereotype - need to hidehide stereotypeskinparam linetype orthoskinparam rectangle { BackgroundColor AWS_BG_COLOR BorderColor transparent}
rectangle "$UserIMG()\nUser" as userAWSCloudGroup(cloud){ RegionGroup(region) { S3BucketGroup(s3) { rectangle "$MultimediaIMG()\n\tvideo\t" as video rectangle "$TapestorageIMG()\n\taudio\t" as audio rectangle "$DocumentsIMG()\n\ttranscript\t" as transcript
user -r-> video: <$Callout_1>\lupload video -r-> audio audio -r-> transcript }
rectangle "$LambdaLambdaFunctionIMG()\nObjectCreated\nevent handler" as e1 rectangle "$ElementalMediaConvertIMG()\nAWS Elemental\nMediaConvert" as mediaconvert rectangle "$TranscribeIMG()\nAmazon Transcribe\n" as transcribe
video -d-> e1: <$Callout_2> e1 -[hidden]r-> mediaconvert mediaconvert -[hidden]r-> transcribe mediaconvert -u-> audio: <$Callout_3> transcribe -u-> transcript: <$Callout_4>
StepFunctionsWorkflowGroup(sfw) { rectangle "$LambdaLambdaFunctionIMG()\nextract audio" as sfw1 rectangle "$LambdaLambdaFunctionIMG()\ntranscribe audio" as sfw2
e1 -r-> sfw1: Start\nExecution sfw1 -r-> sfw2 sfw1 -u-> mediaconvert sfw2 -u-> transcribe } }}
@enduml